> For the complete documentation index, see [llms.txt](https://documentation.siteglide.com/llms.txt). Markdown versions of documentation pages are available by appending `.md` to page URLs; this page is available as [Markdown](https://documentation.siteglide.com/webapps/quickstart-webapps.md).

# Quickstart: WebApps

## Step 1: Create a WebApp or Edit an Existing

Create a New WebApp from the left menu or if others already exist you can edit them:

<figure><img src="https://584571746-files.gitbook.io/~/files/v0/b/gitbook-x-prod.appspot.com/o/spaces%2Ft7n2OYNNUr9PgpkBD2eX%2Fuploads%2Fgit-blob-22a637a09ed1dd7cebbbd45e65d19abc77a087fd%2FSiteglide-WebApps-Item.png?alt=media" alt=""><figcaption></figcaption></figure>

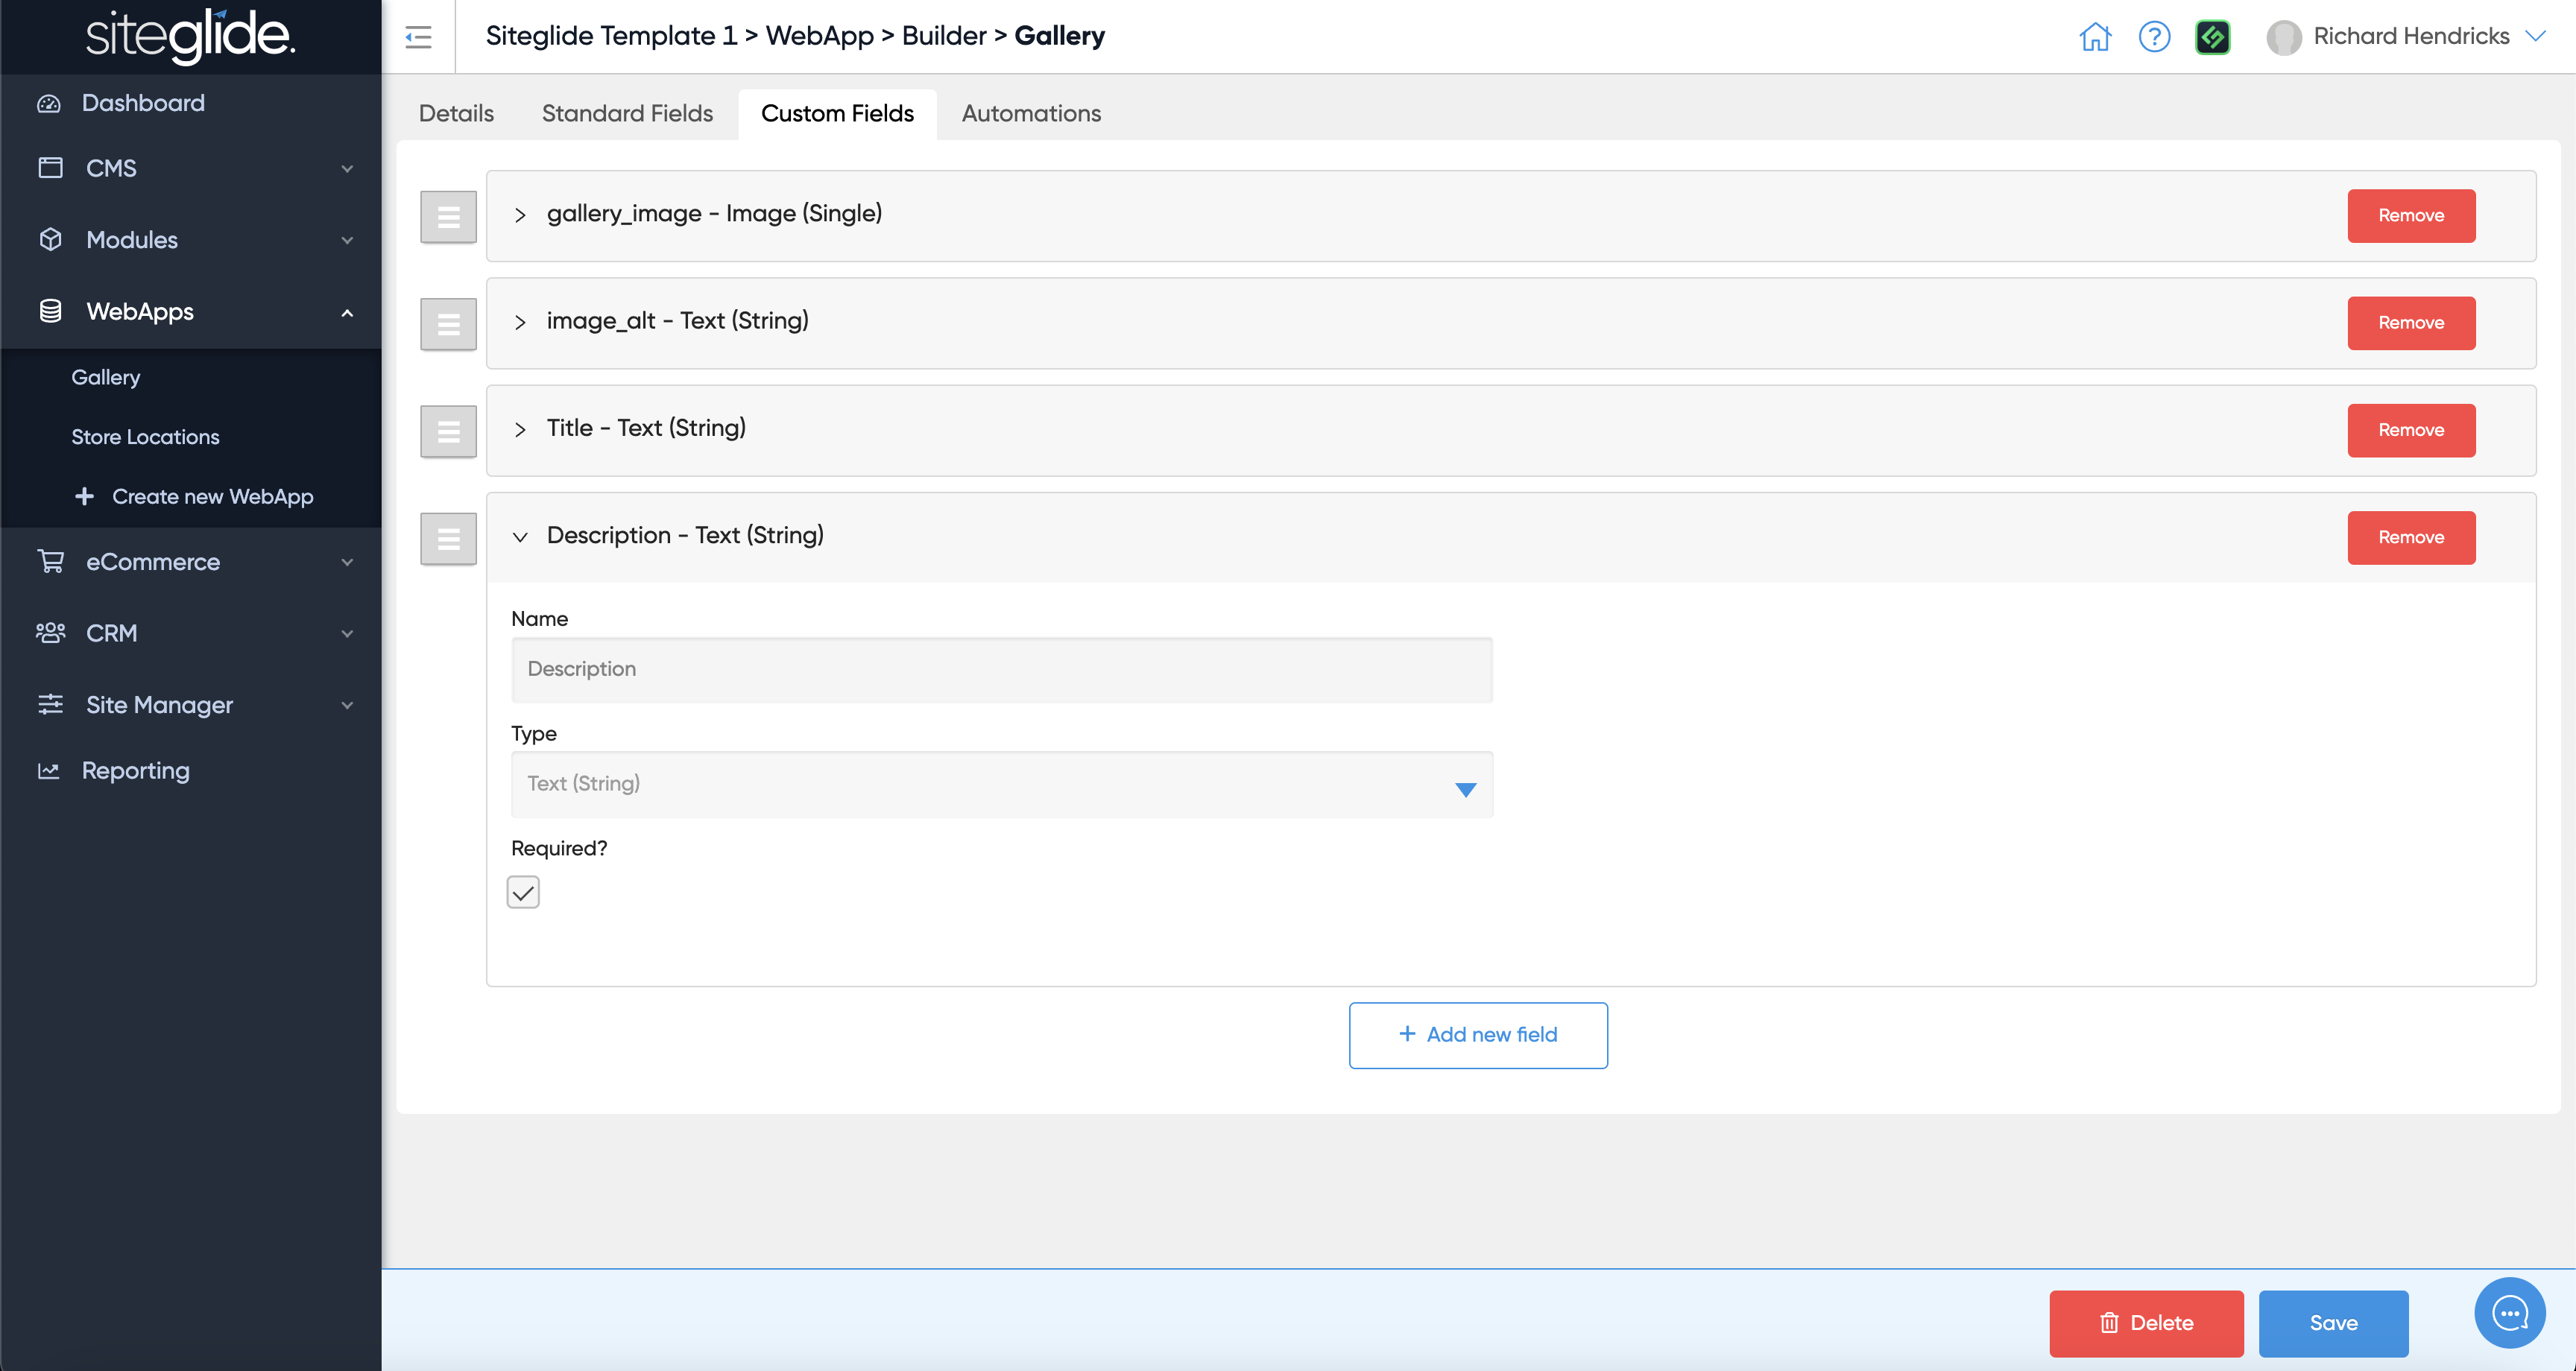
## Step 2: Add or Edit any Custom Fields

<figure><img src="https://584571746-files.gitbook.io/~/files/v0/b/gitbook-x-prod.appspot.com/o/spaces%2Ft7n2OYNNUr9PgpkBD2eX%2Fuploads%2Fgit-blob-c38c464cb8b3914105091f3c33a6fa324c6c65ba%2FSiteglide-WebApp-Create-Custom-Fields.png?alt=media" alt=""><figcaption></figcaption></figure>

## Step 3: Add or Edit Items

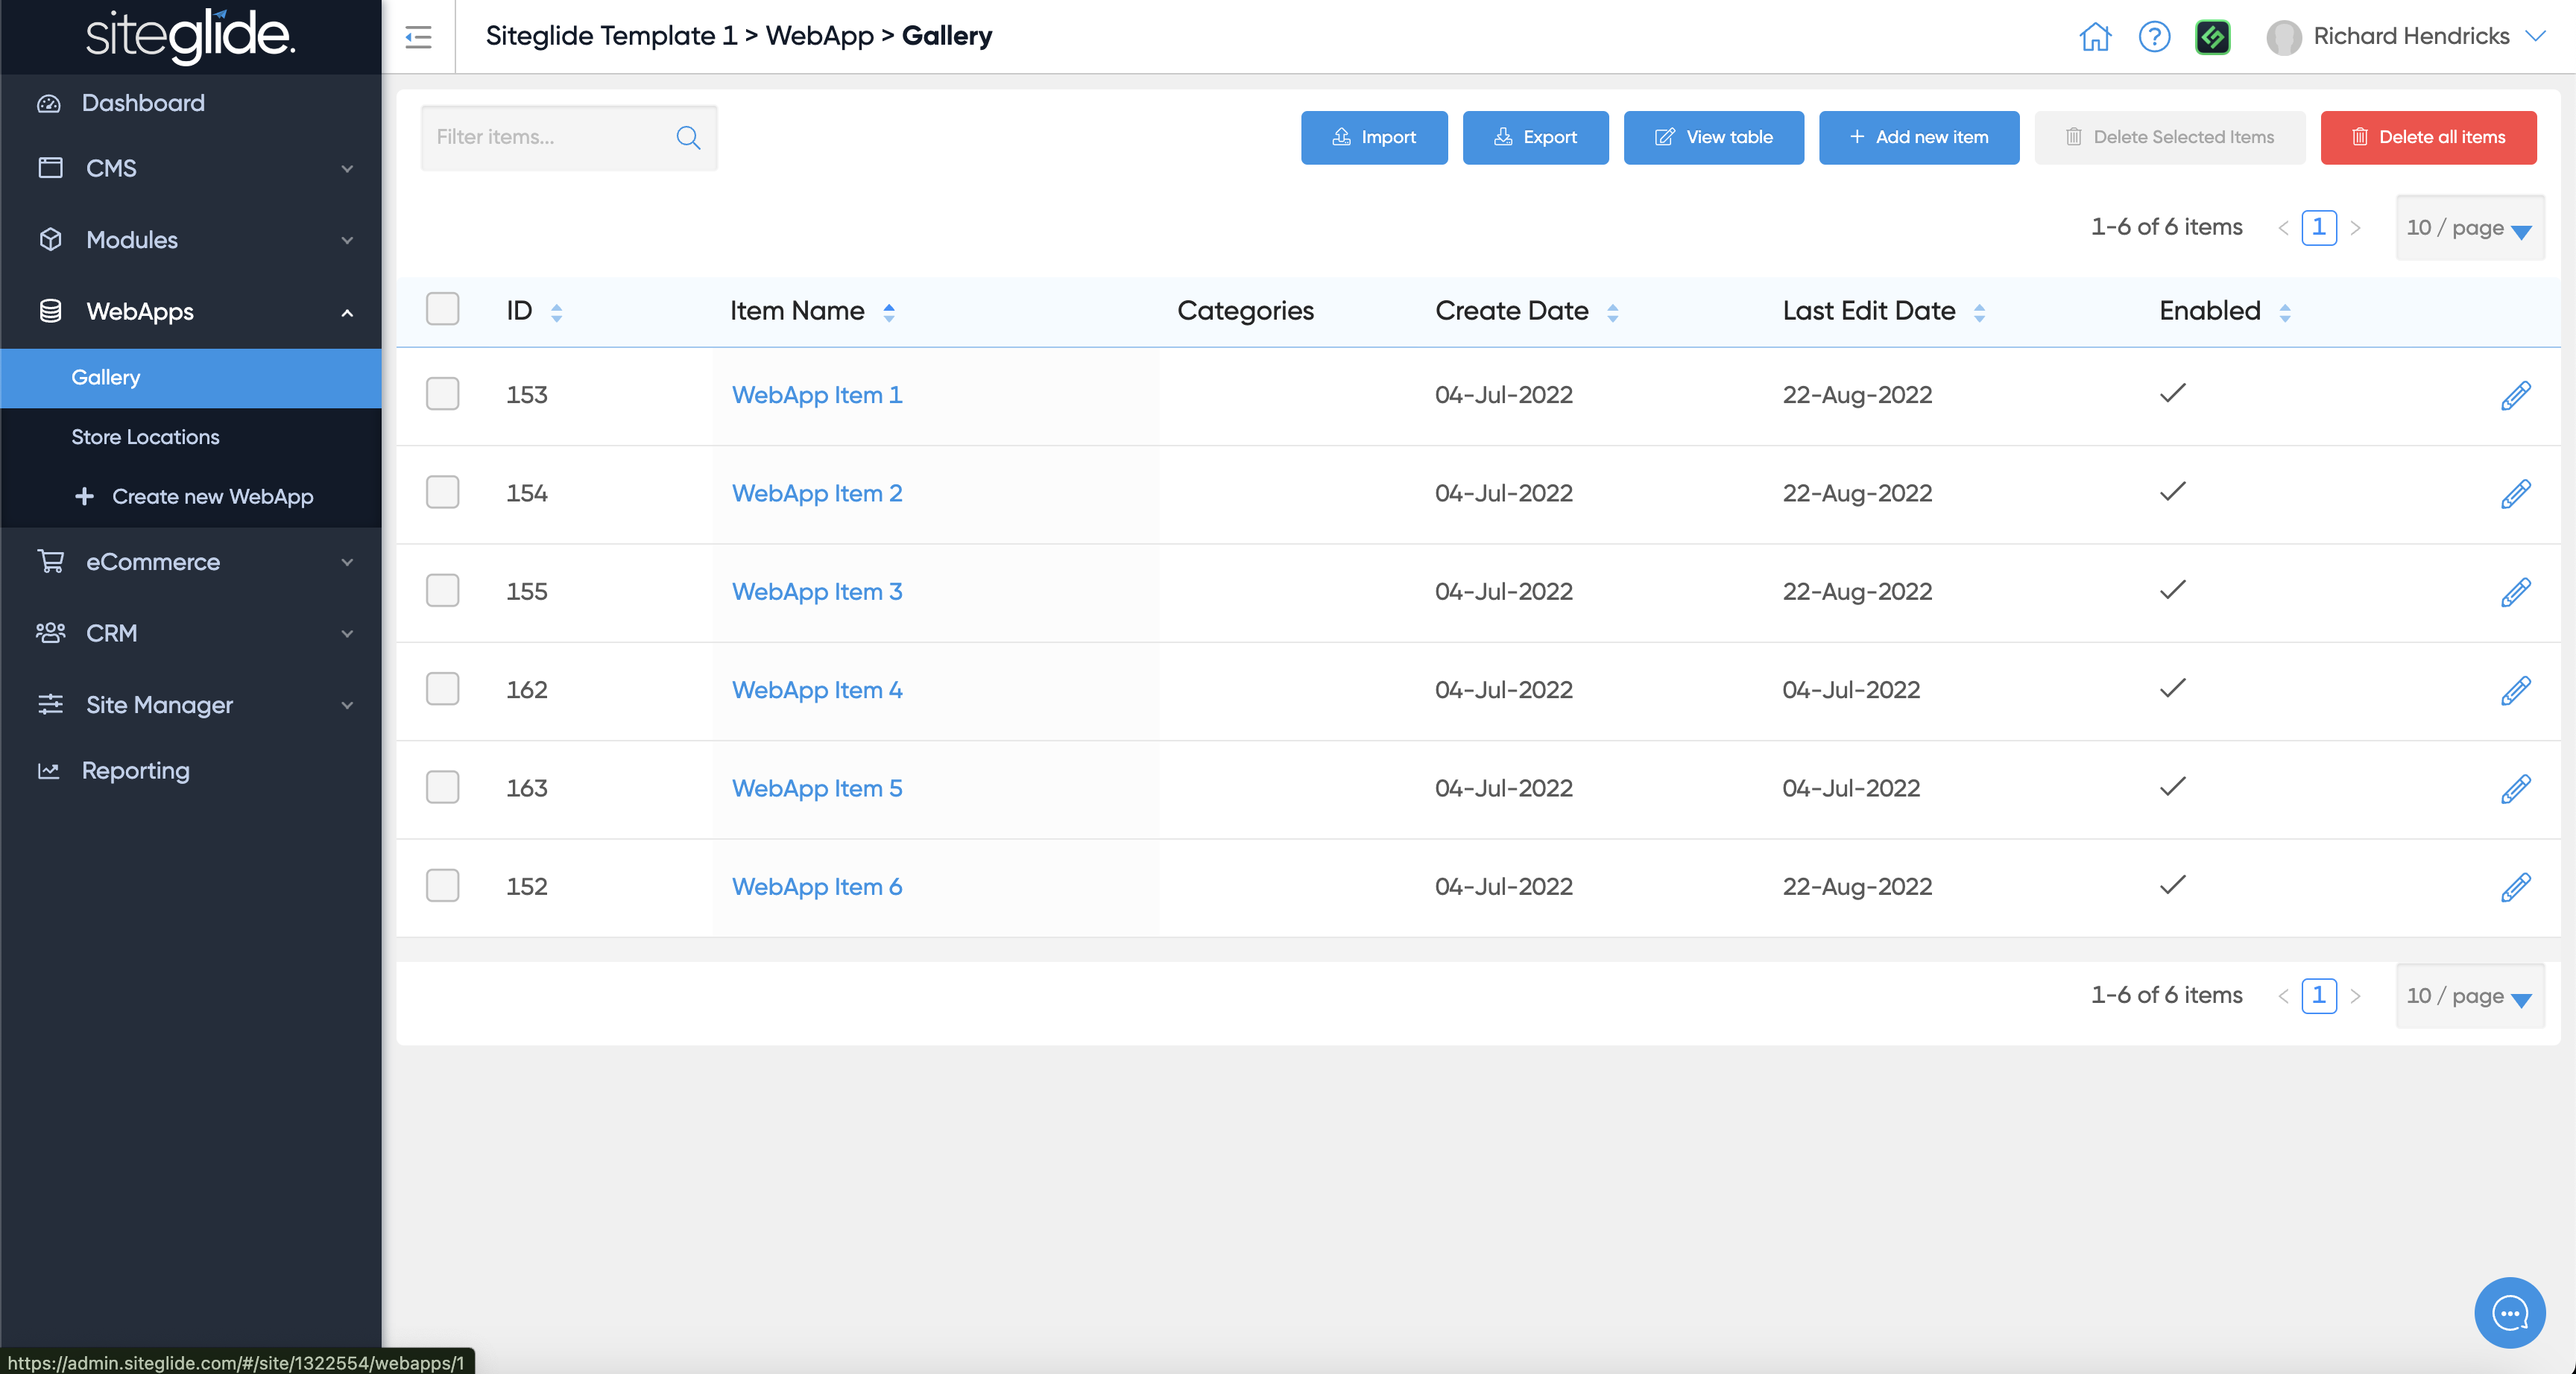
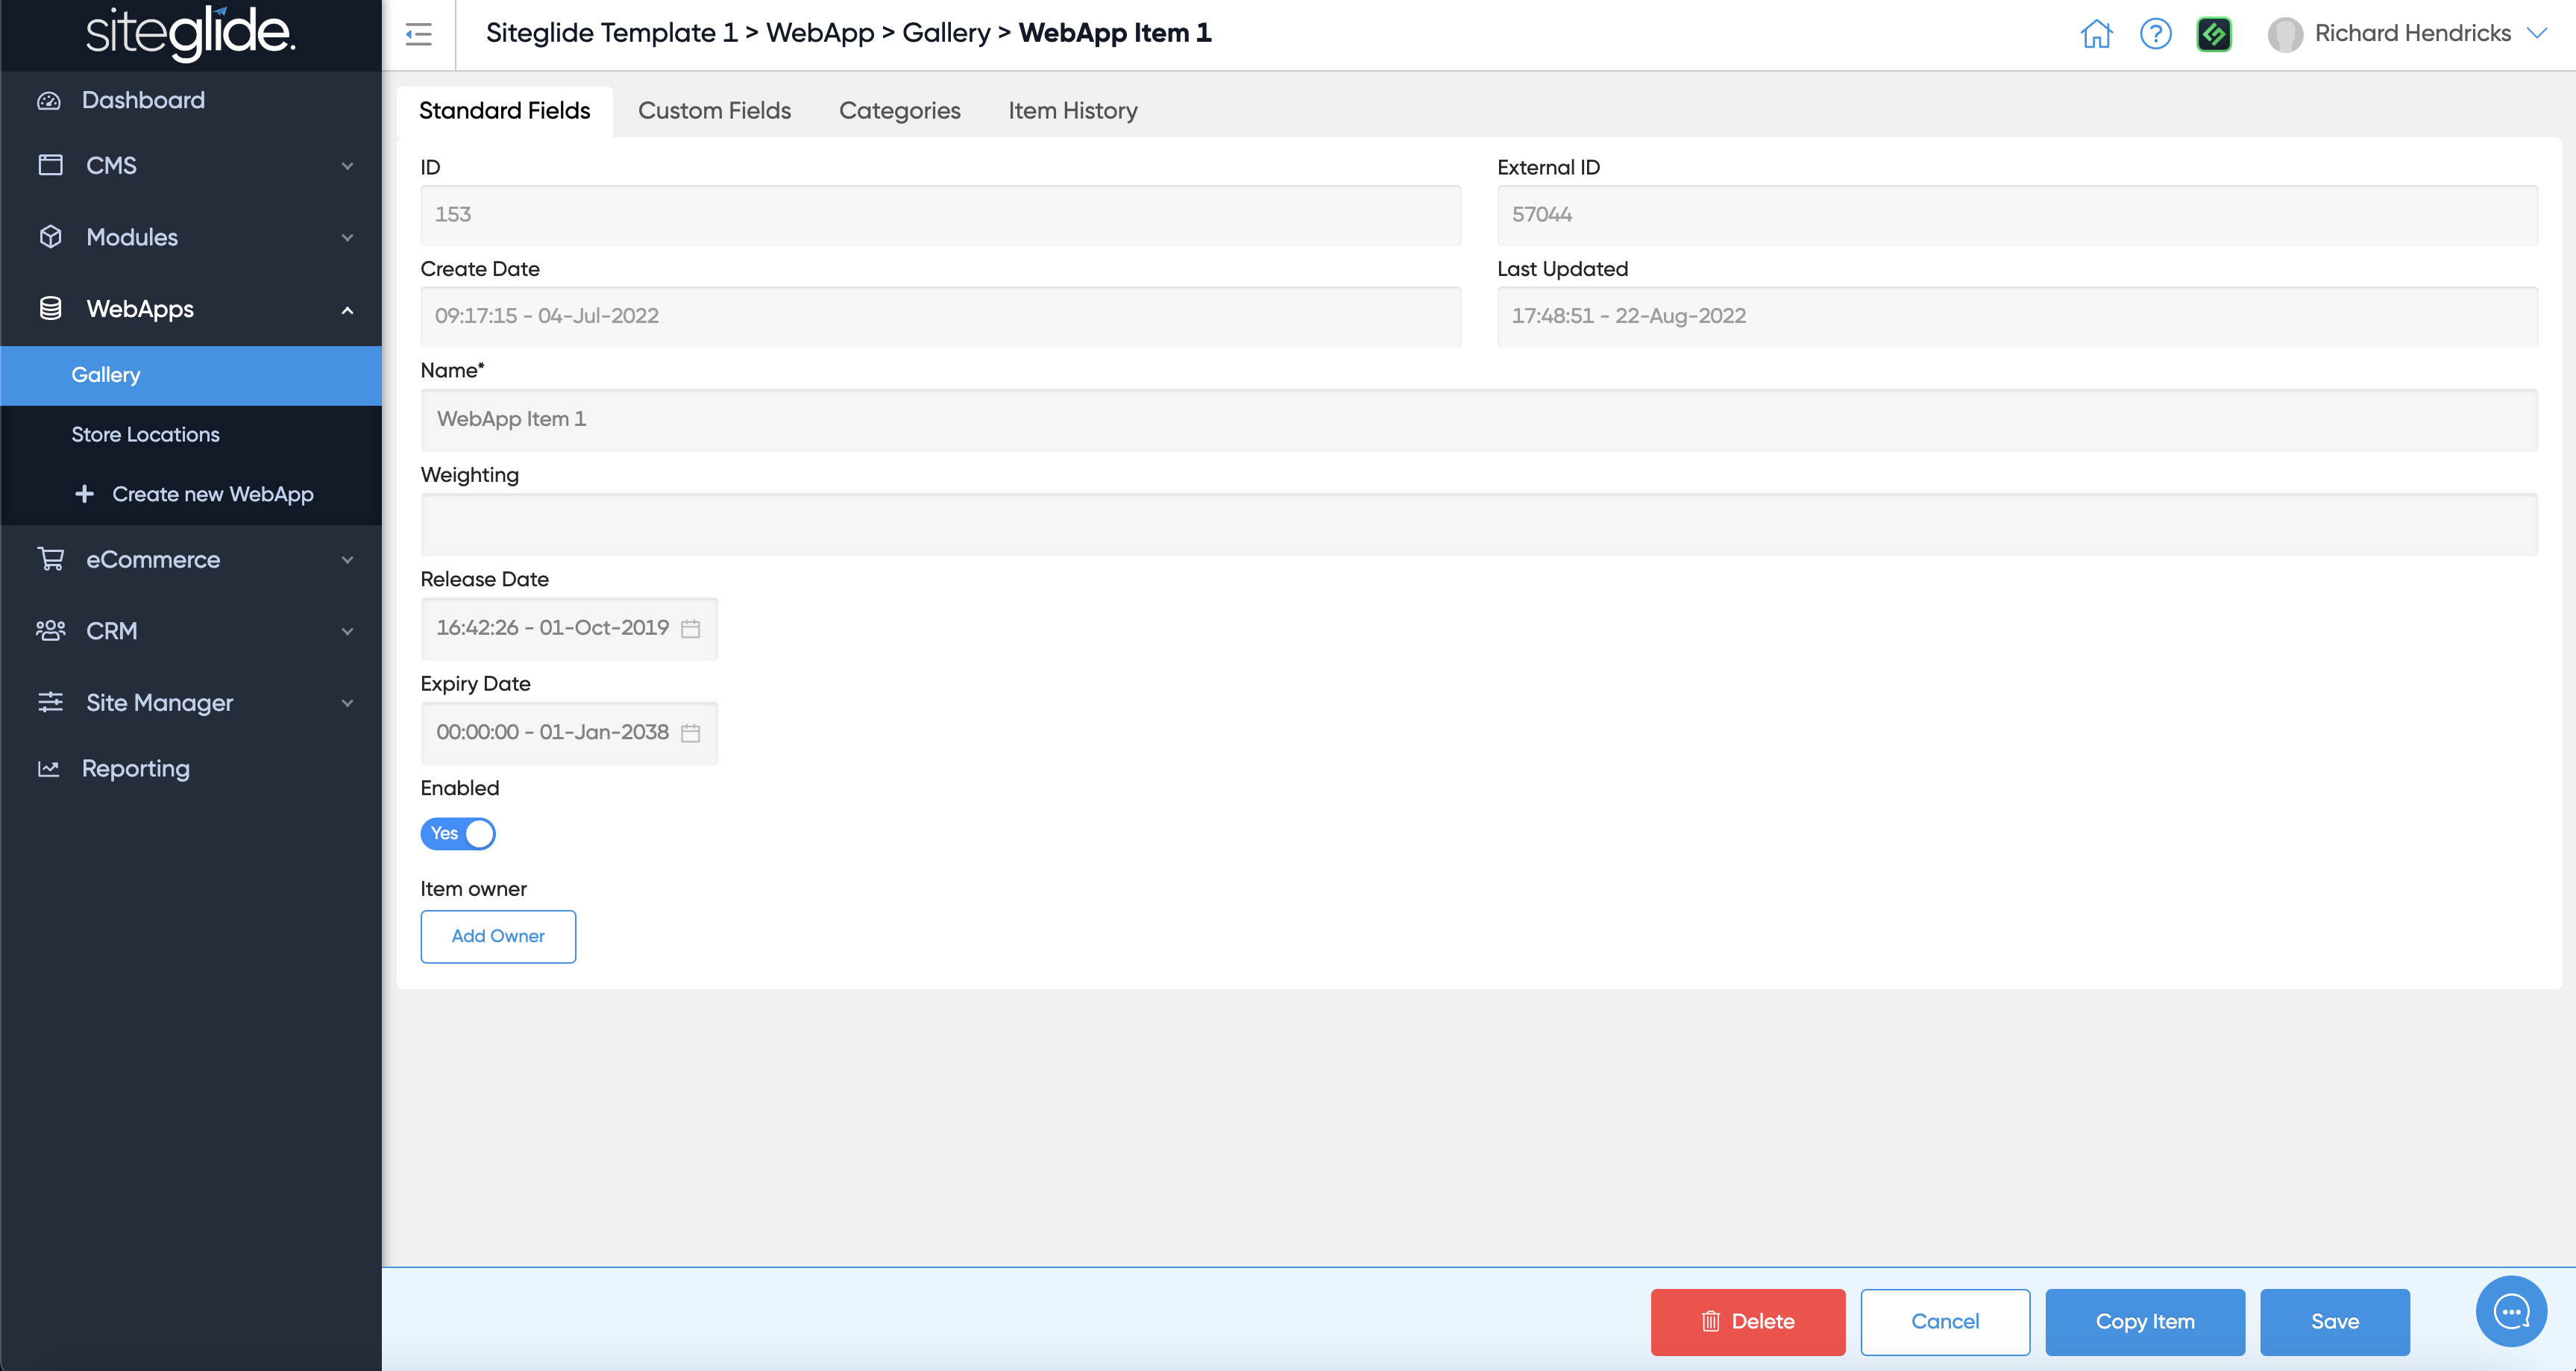
You can create and edit items from the WebApp in the UI:

<figure><img src="https://584571746-files.gitbook.io/~/files/v0/b/gitbook-x-prod.appspot.com/o/spaces%2Ft7n2OYNNUr9PgpkBD2eX%2Fuploads%2Fgit-blob-e1cc960b0371ac95dbb7912e16f14942912d3465%2FSiteglide-WebApps-Items-List.png?alt=media" alt=""><figcaption></figcaption></figure>

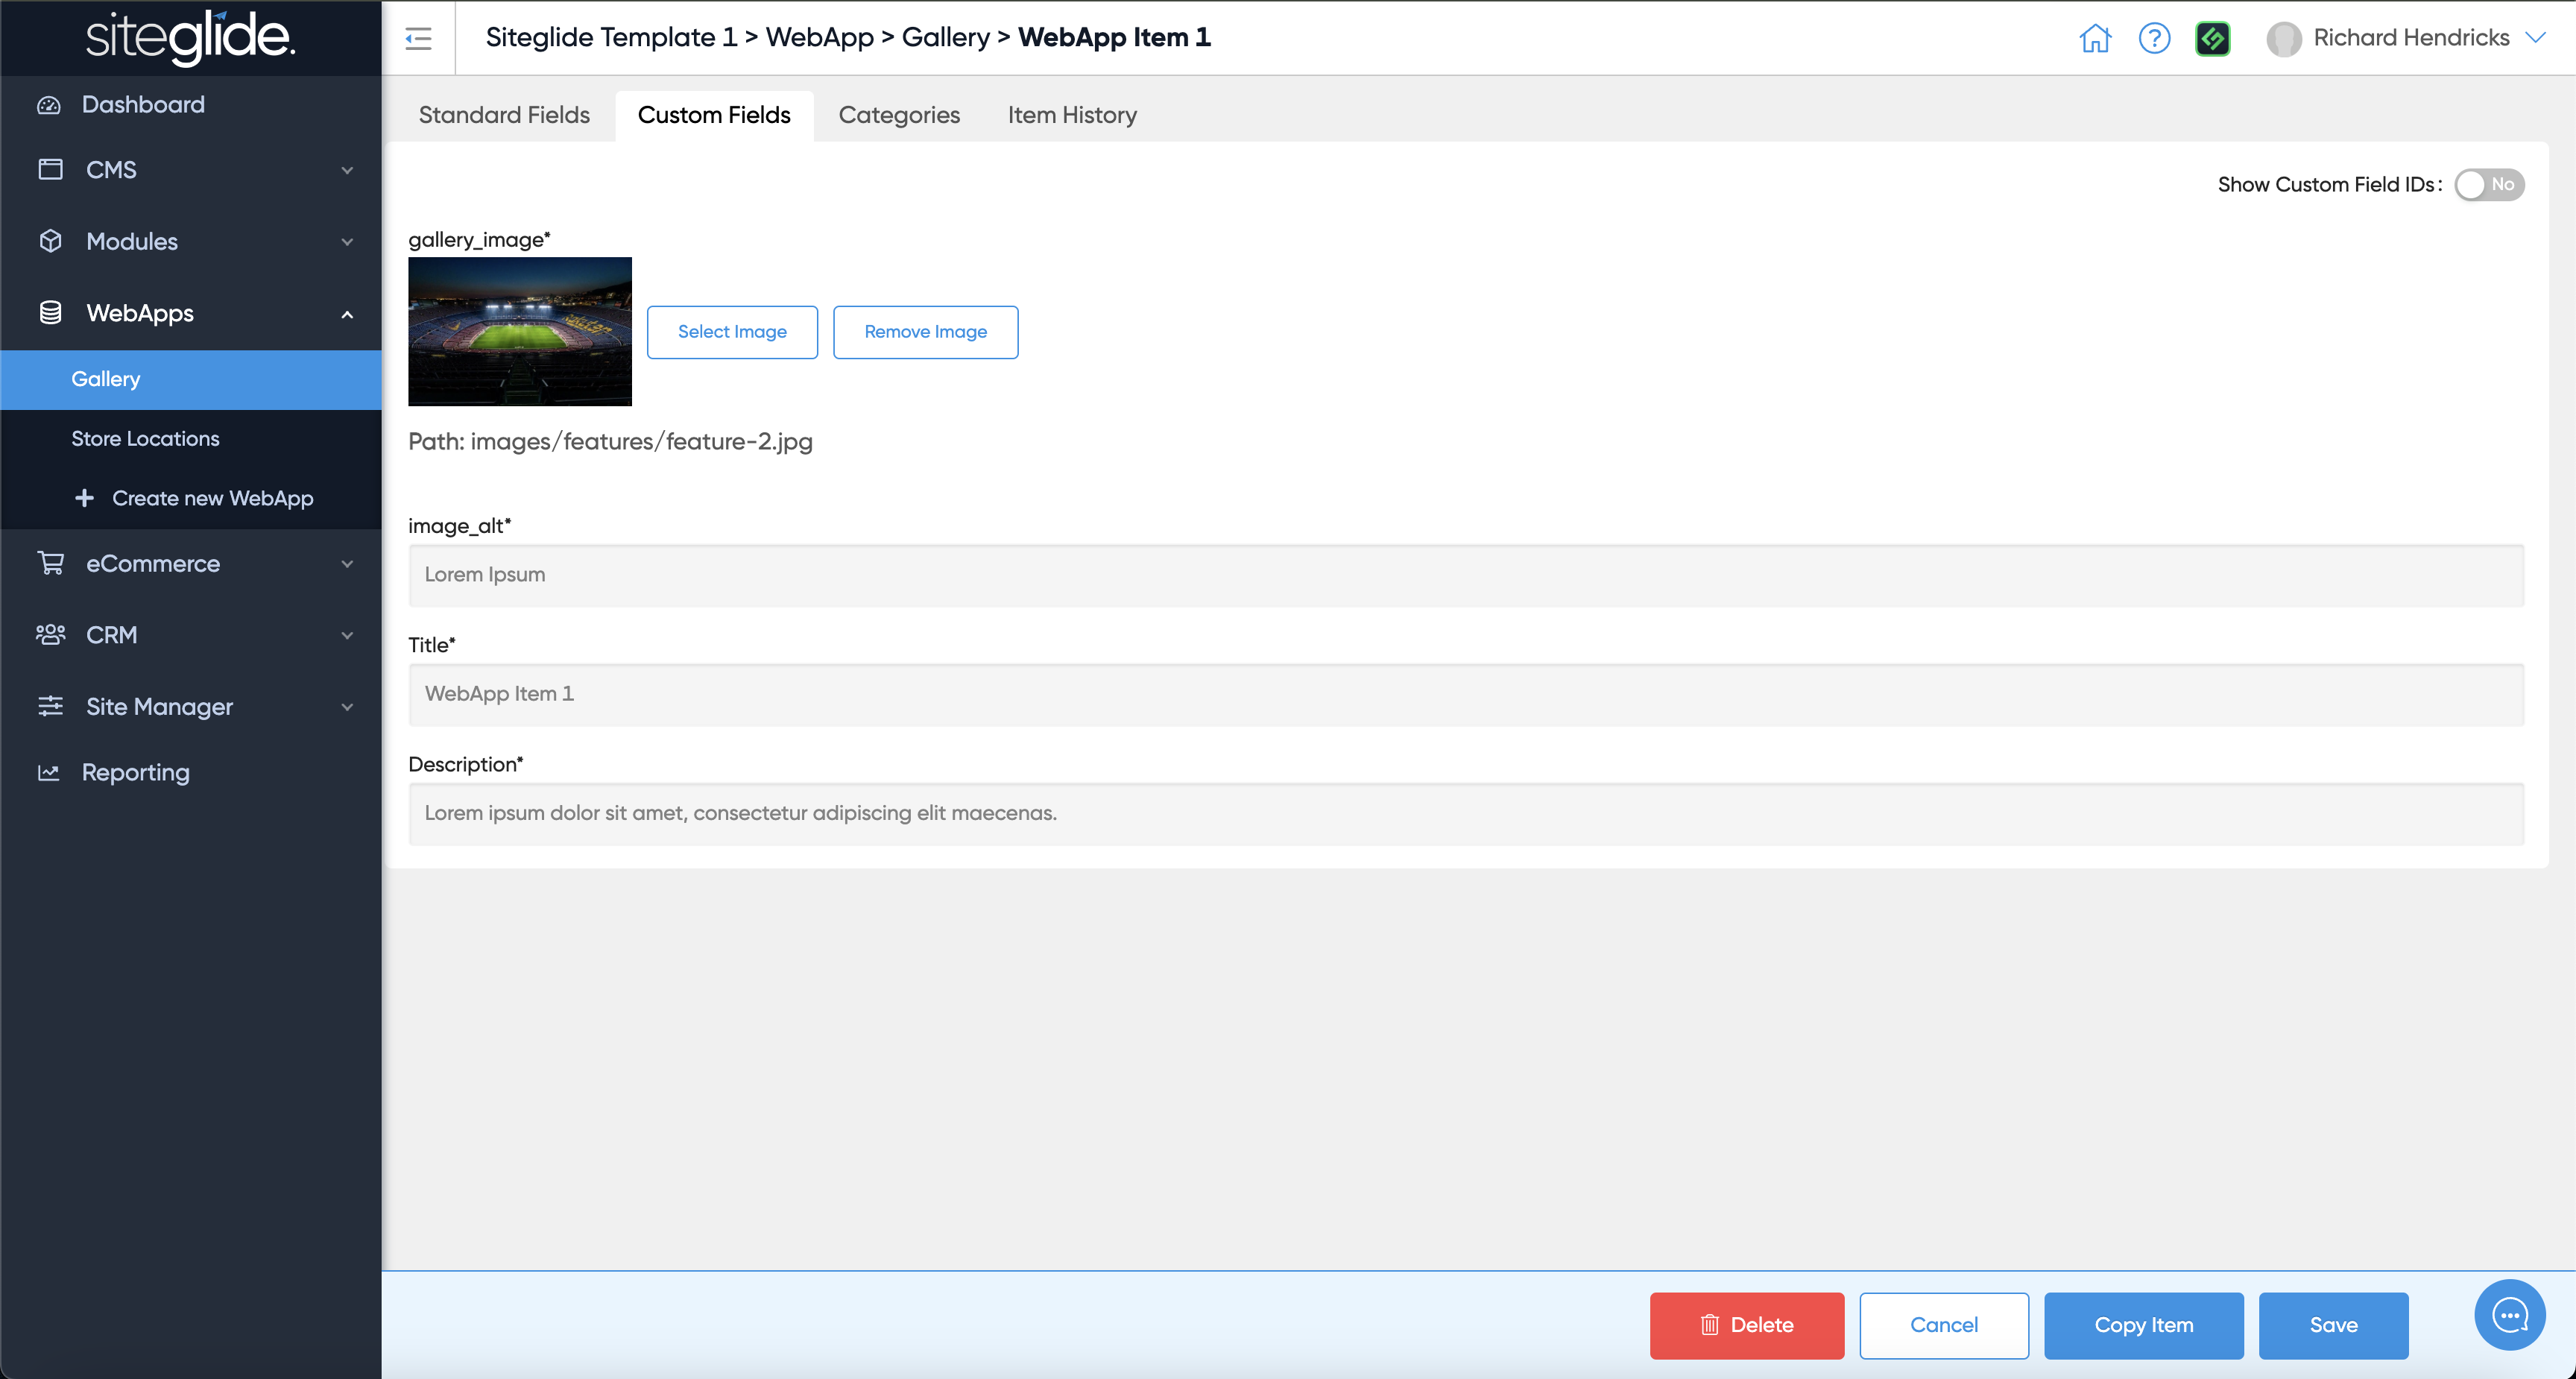
You will see the custom fields you create in the setup stage and can fill in the content:

<figure><img src="https://584571746-files.gitbook.io/~/files/v0/b/gitbook-x-prod.appspot.com/o/spaces%2Ft7n2OYNNUr9PgpkBD2eX%2Fuploads%2Fgit-blob-0307d54b5816c342fe8e79b06fcc74a55957c48f%2FSiteglide-WebApps-Item-Custom-Fields.png?alt=media" alt=""><figcaption></figcaption></figure>

Full details here:

{% content-ref url="/pages/YssPhBCL8RcbJZVaOK9S" %}
[Create WebApp Items](https://documentation.siteglide.com/webapps/items/create-webapp-items.md)
{% endcontent-ref %}

## Step 3: Customise the Layout

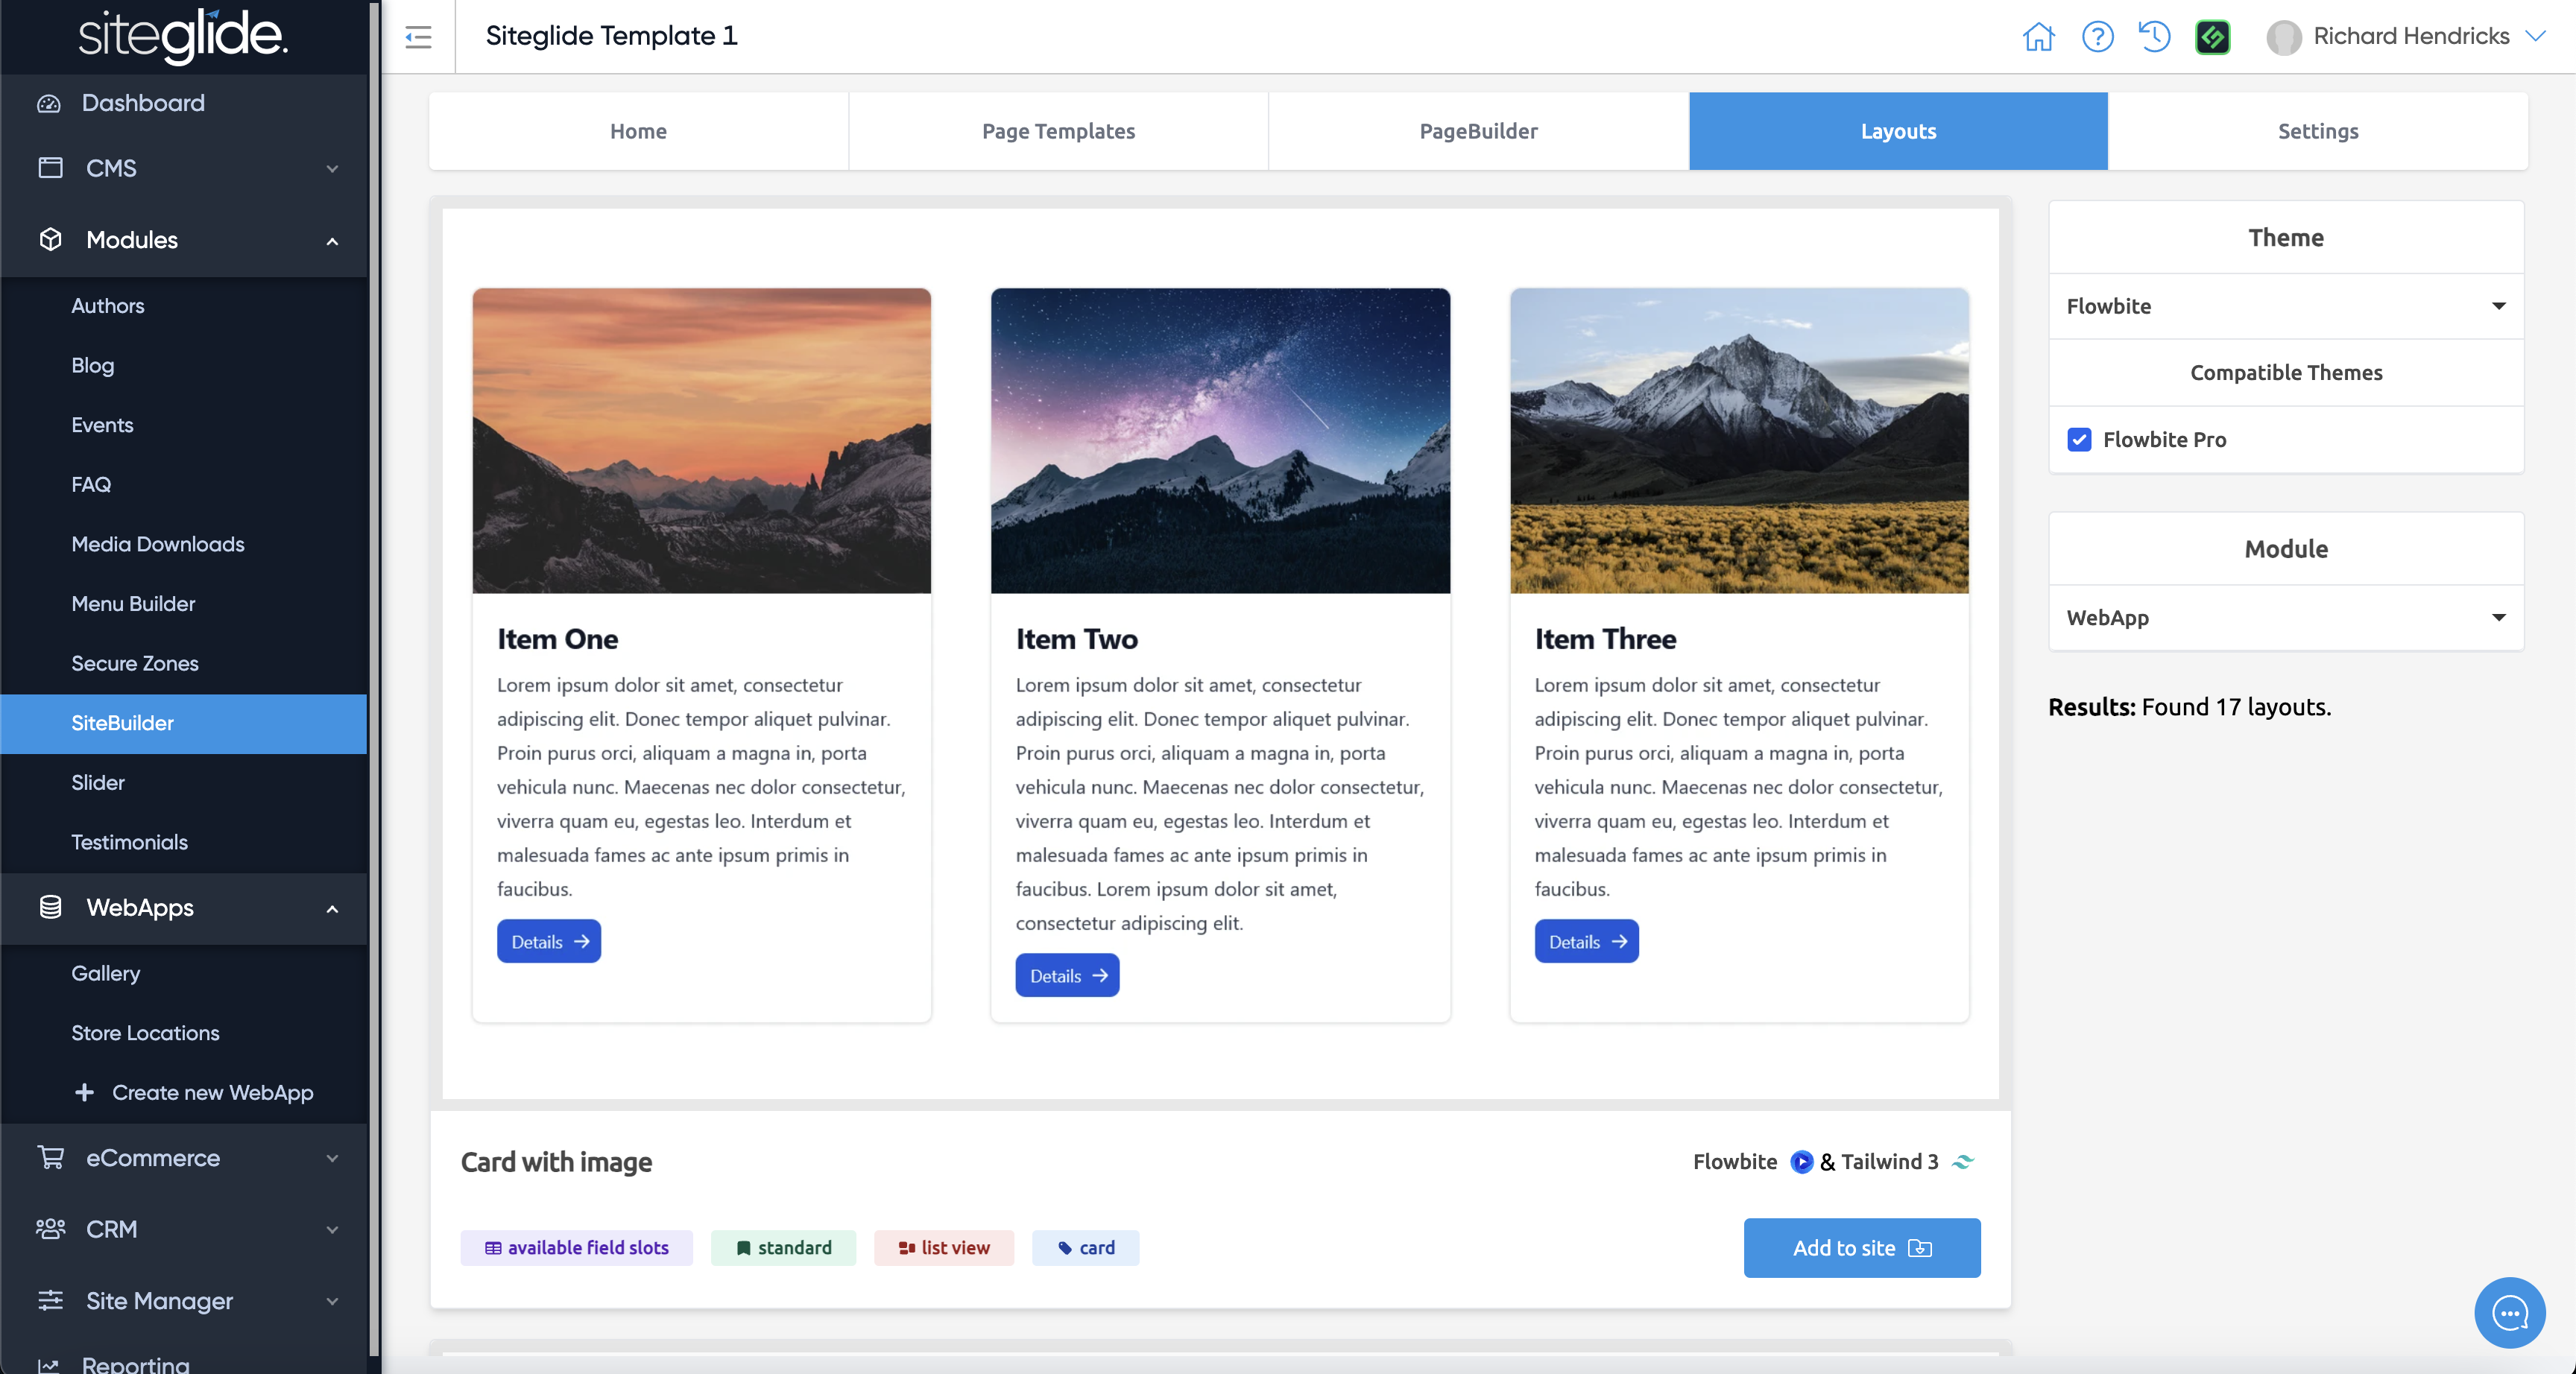
You can edit the default layouts or create new ones via CLI and Code Editor but we strongly recommend using SiteBuilder.

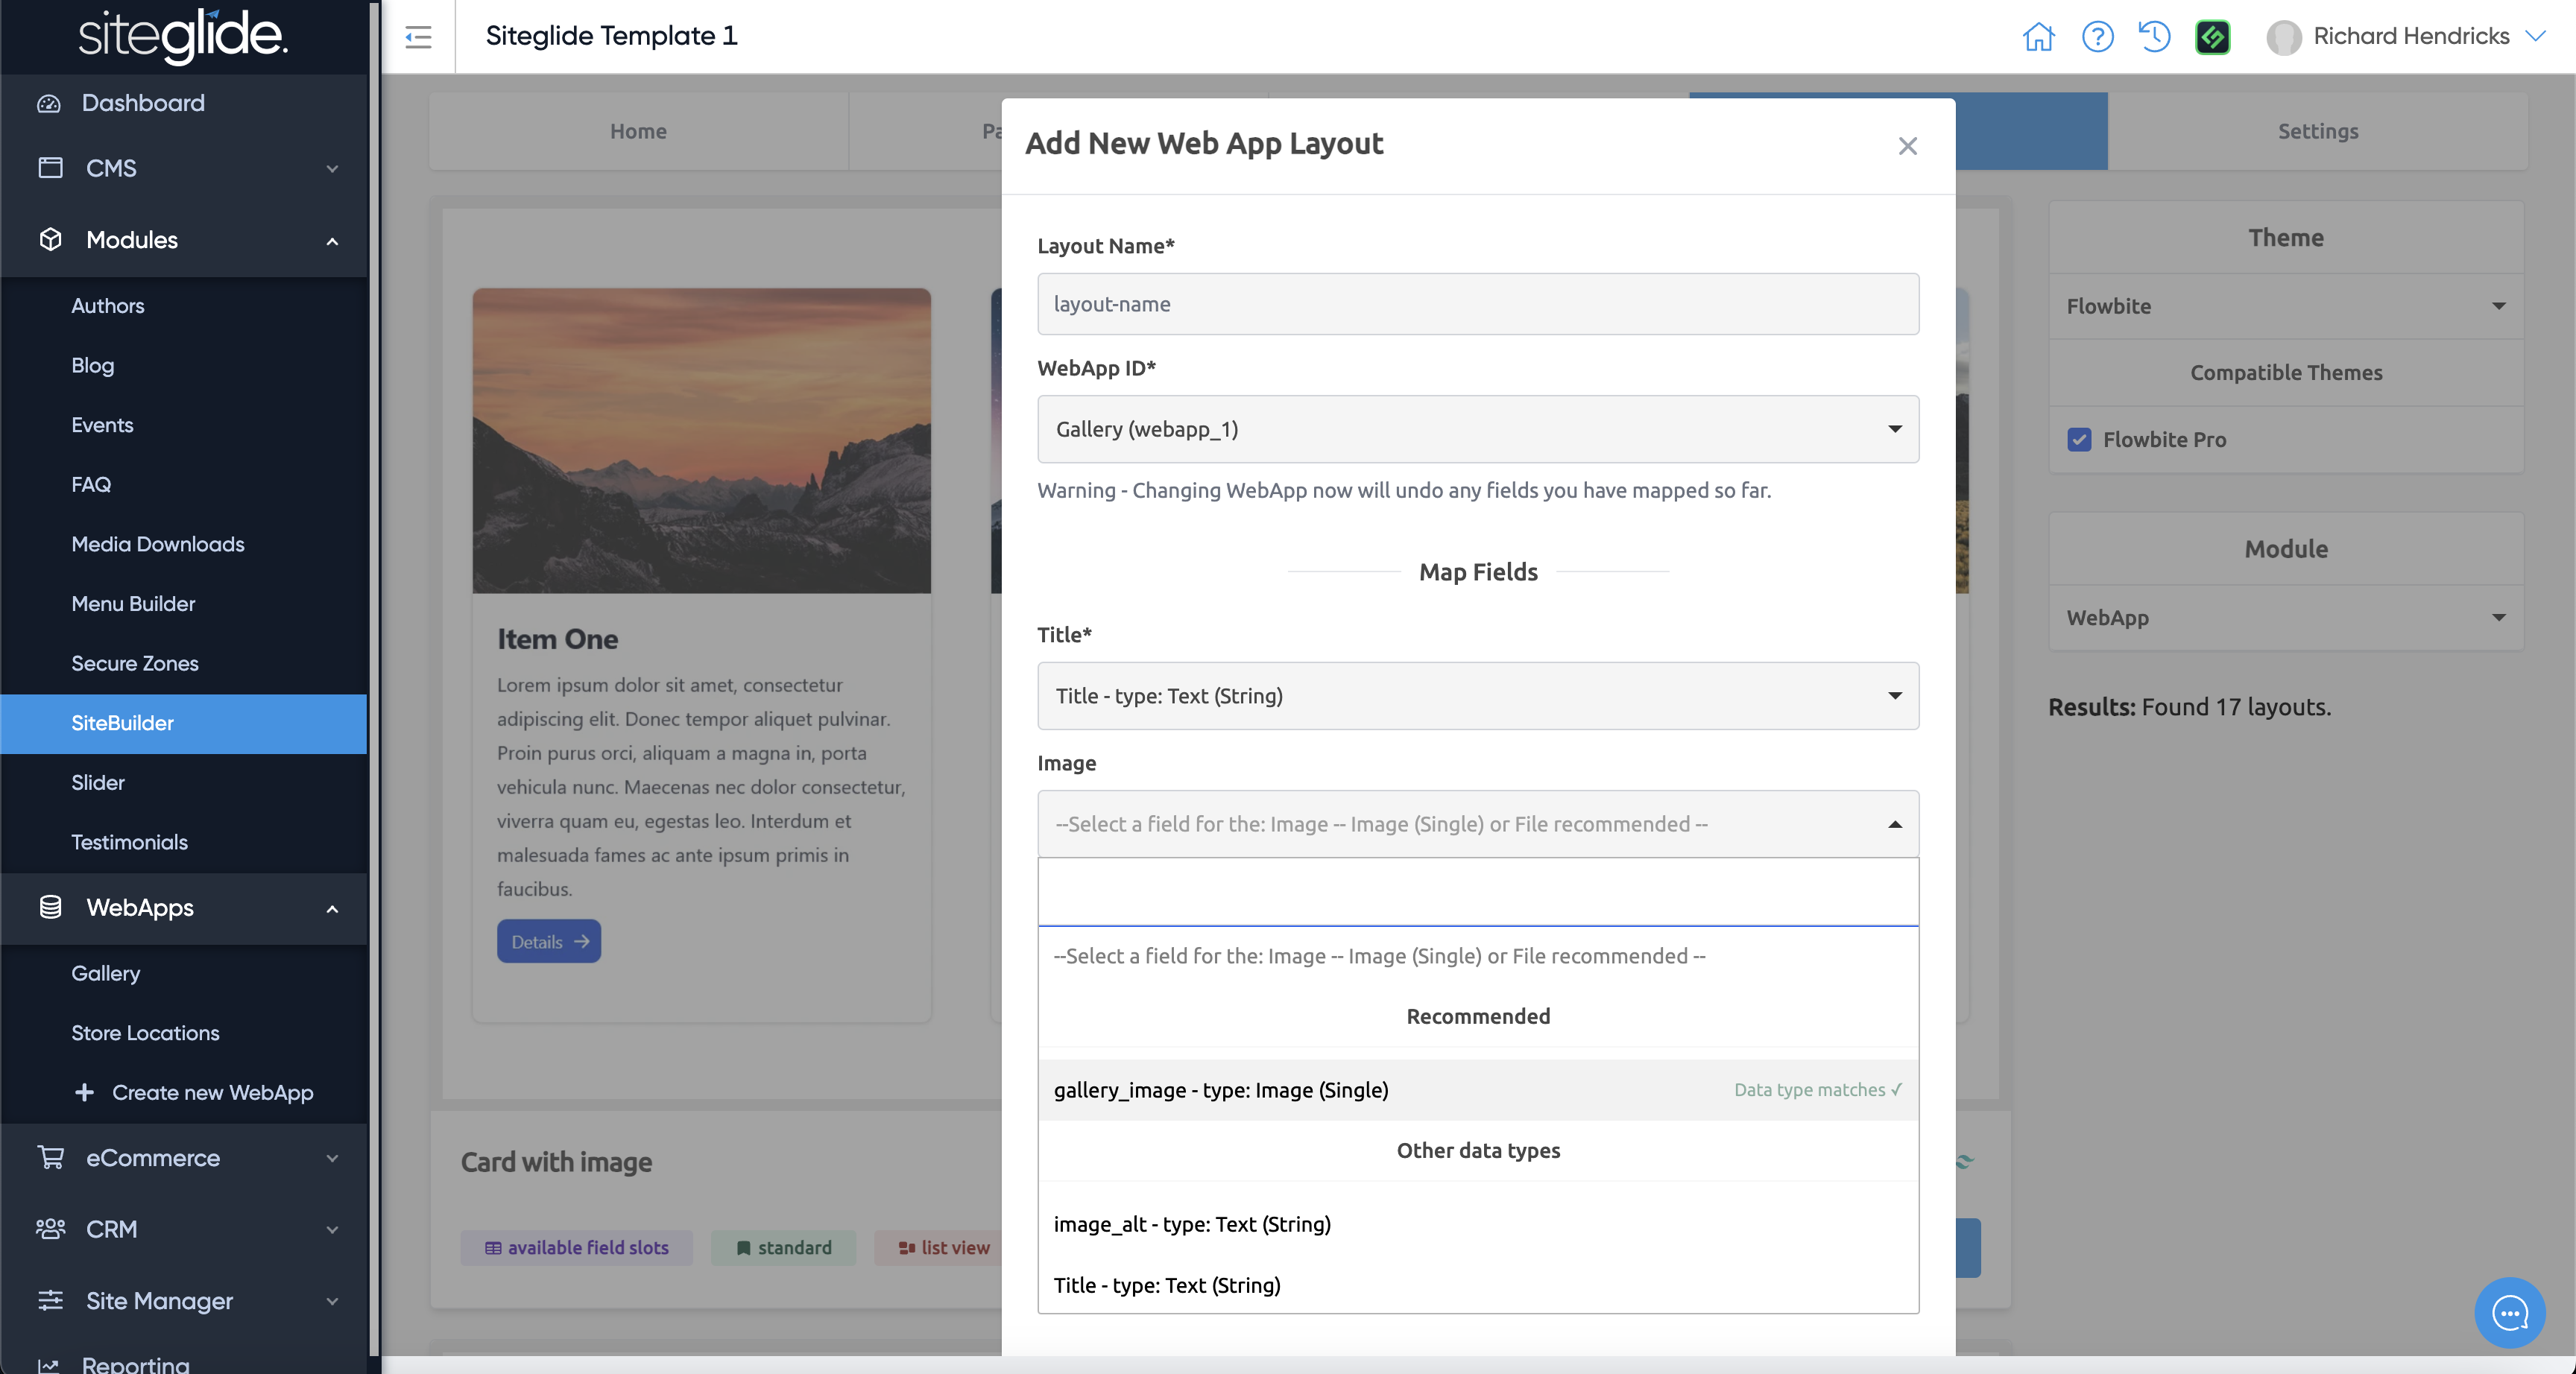
Simply navigate to the SiteBuilder Module, click Layouts, choose WebApp from the Module dropdown and find a layout you want to use:

<figure><img src="https://584571746-files.gitbook.io/~/files/v0/b/gitbook-x-prod.appspot.com/o/spaces%2Ft7n2OYNNUr9PgpkBD2eX%2Fuploads%2Fgit-blob-cde46d53cbe352b96ffdc5f137c5e97c85adec90%2FSiteglide-WebApps-SiteBuilder-Layout.png?alt=media" alt=""><figcaption></figcaption></figure>

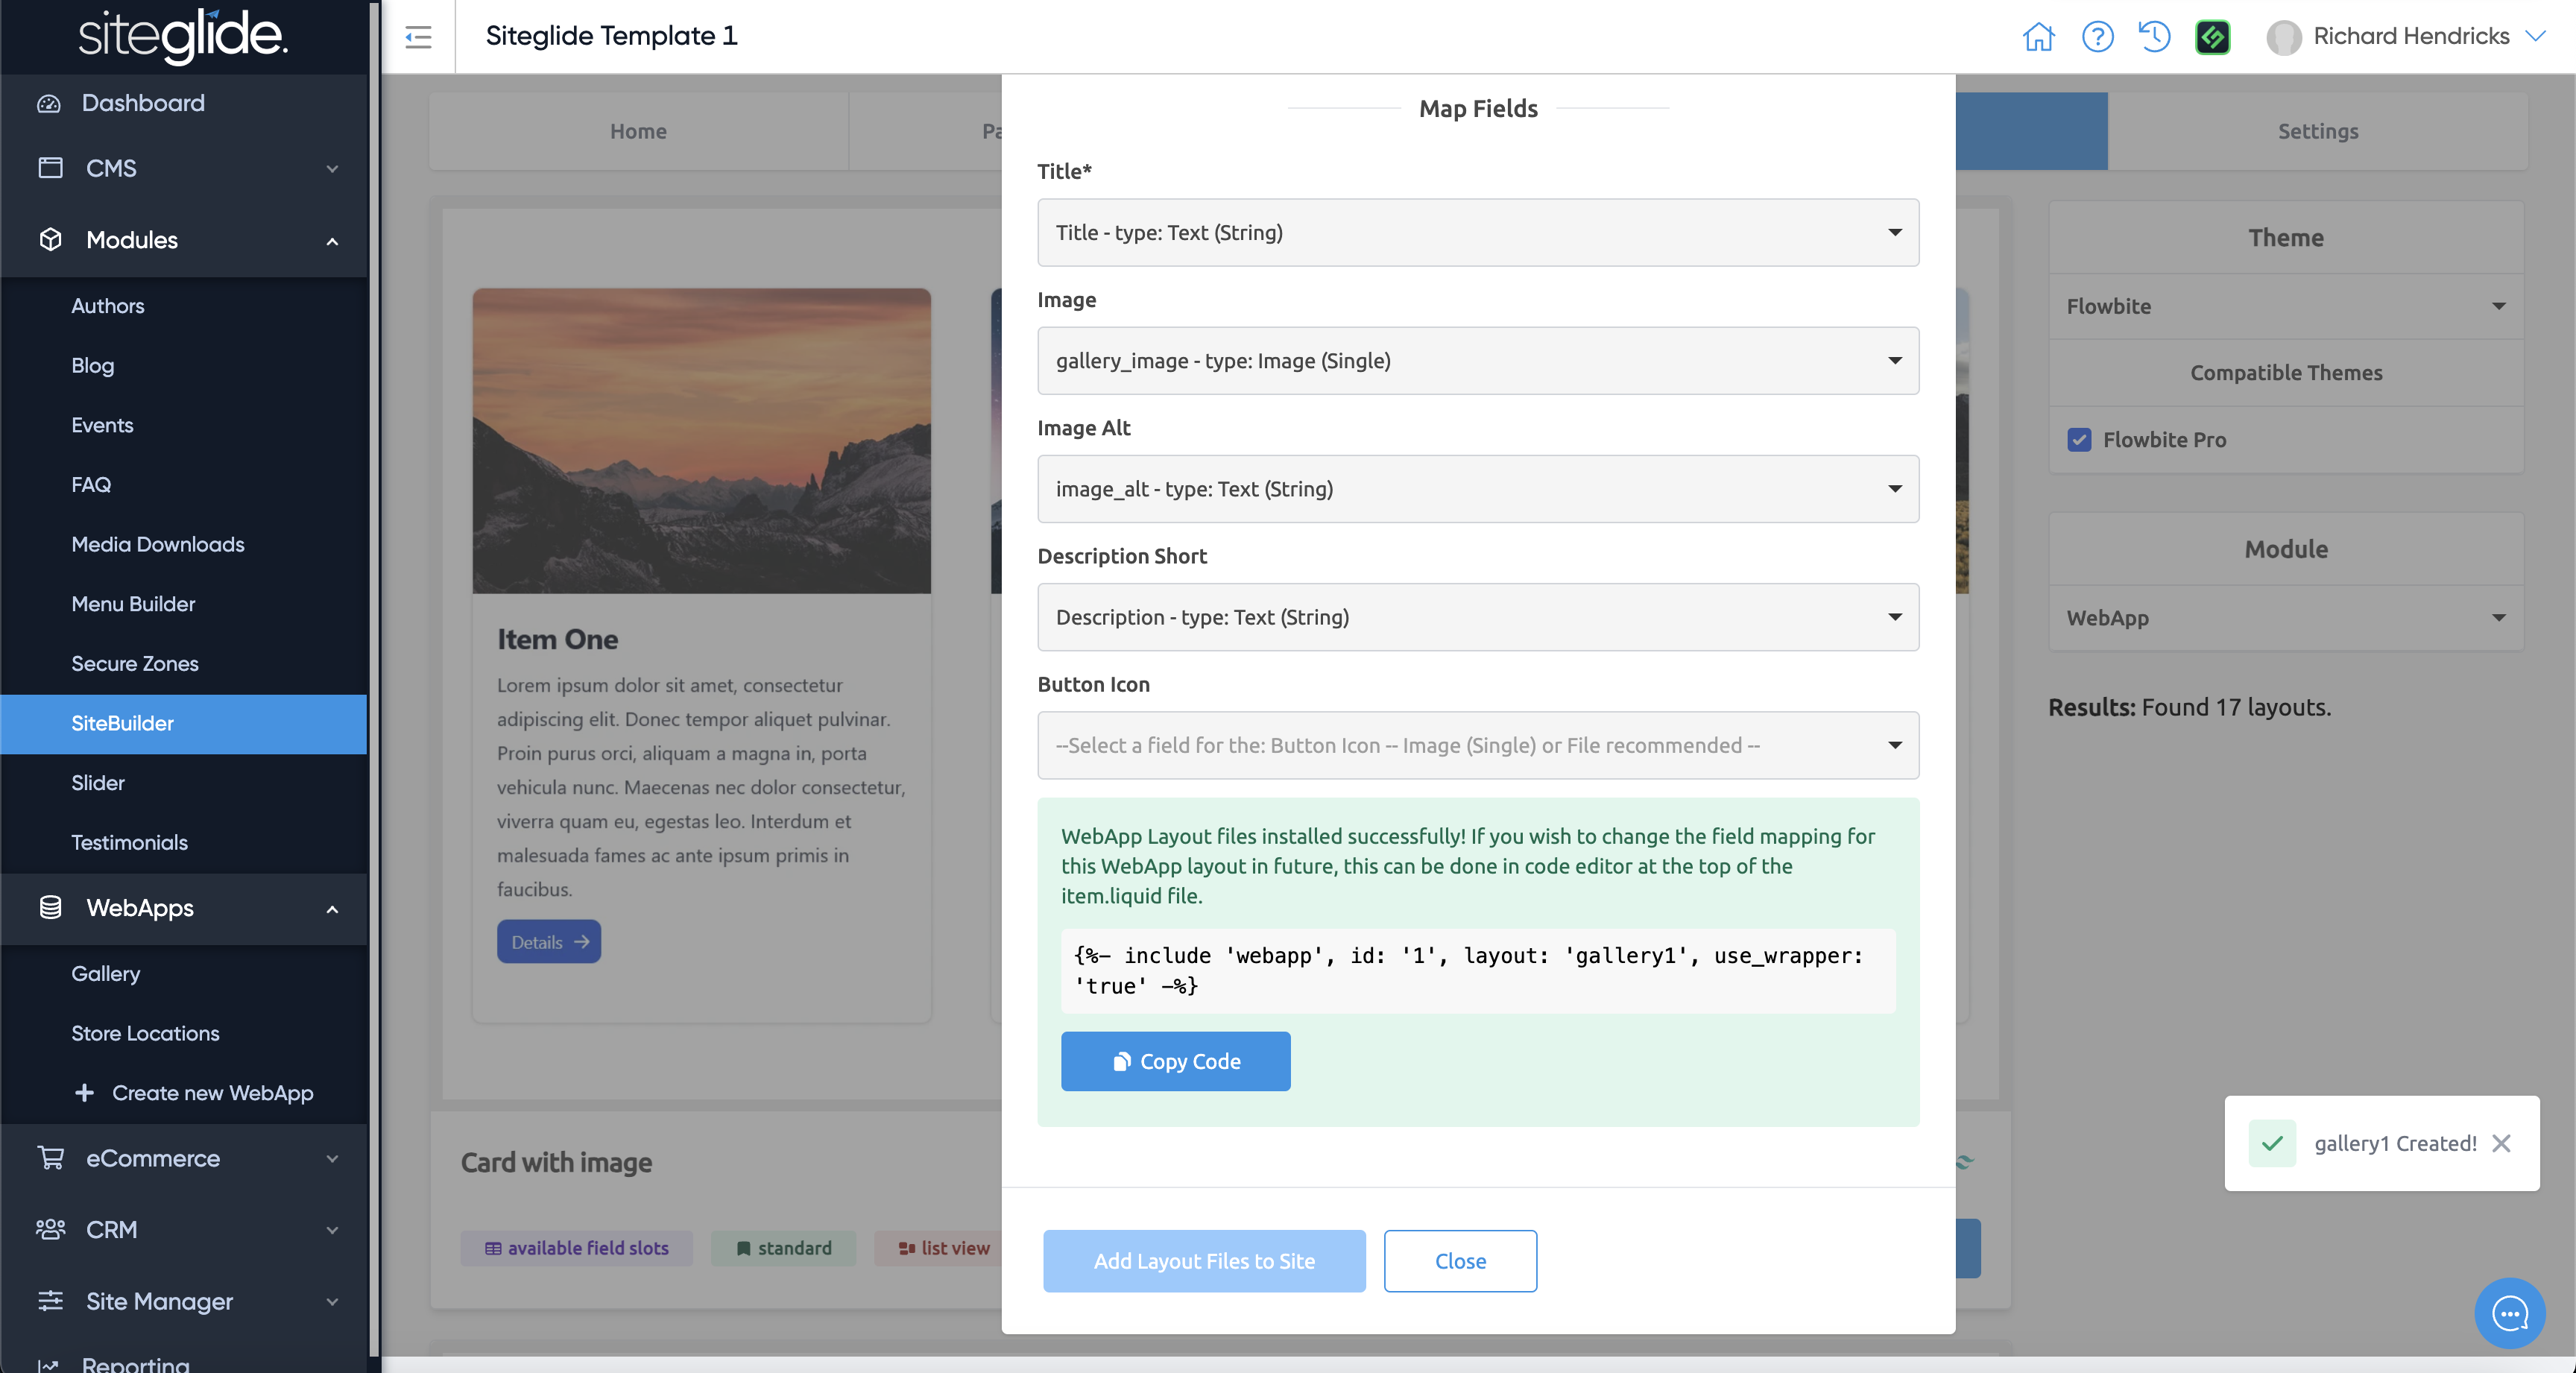
Map the Webapp Fields to the Layout Fields:

<figure><img src="https://584571746-files.gitbook.io/~/files/v0/b/gitbook-x-prod.appspot.com/o/spaces%2Ft7n2OYNNUr9PgpkBD2eX%2Fuploads%2Fgit-blob-cd3022cd5de4b5e94e83c573e56c7682efc9f7e8%2FSiteglide-WebApps-SiteBuilder-Map-Fields.png?alt=media" alt=""><figcaption></figcaption></figure>

Then copy the Liquid include so you can insert it on a page:

<figure><img src="https://584571746-files.gitbook.io/~/files/v0/b/gitbook-x-prod.appspot.com/o/spaces%2Ft7n2OYNNUr9PgpkBD2eX%2Fuploads%2Fgit-blob-415bf8af56136c65990d8fc5860db9a60a362856%2FSiteglide-WebApps-SiteBuilder-Include.png?alt=media" alt=""><figcaption></figcaption></figure>

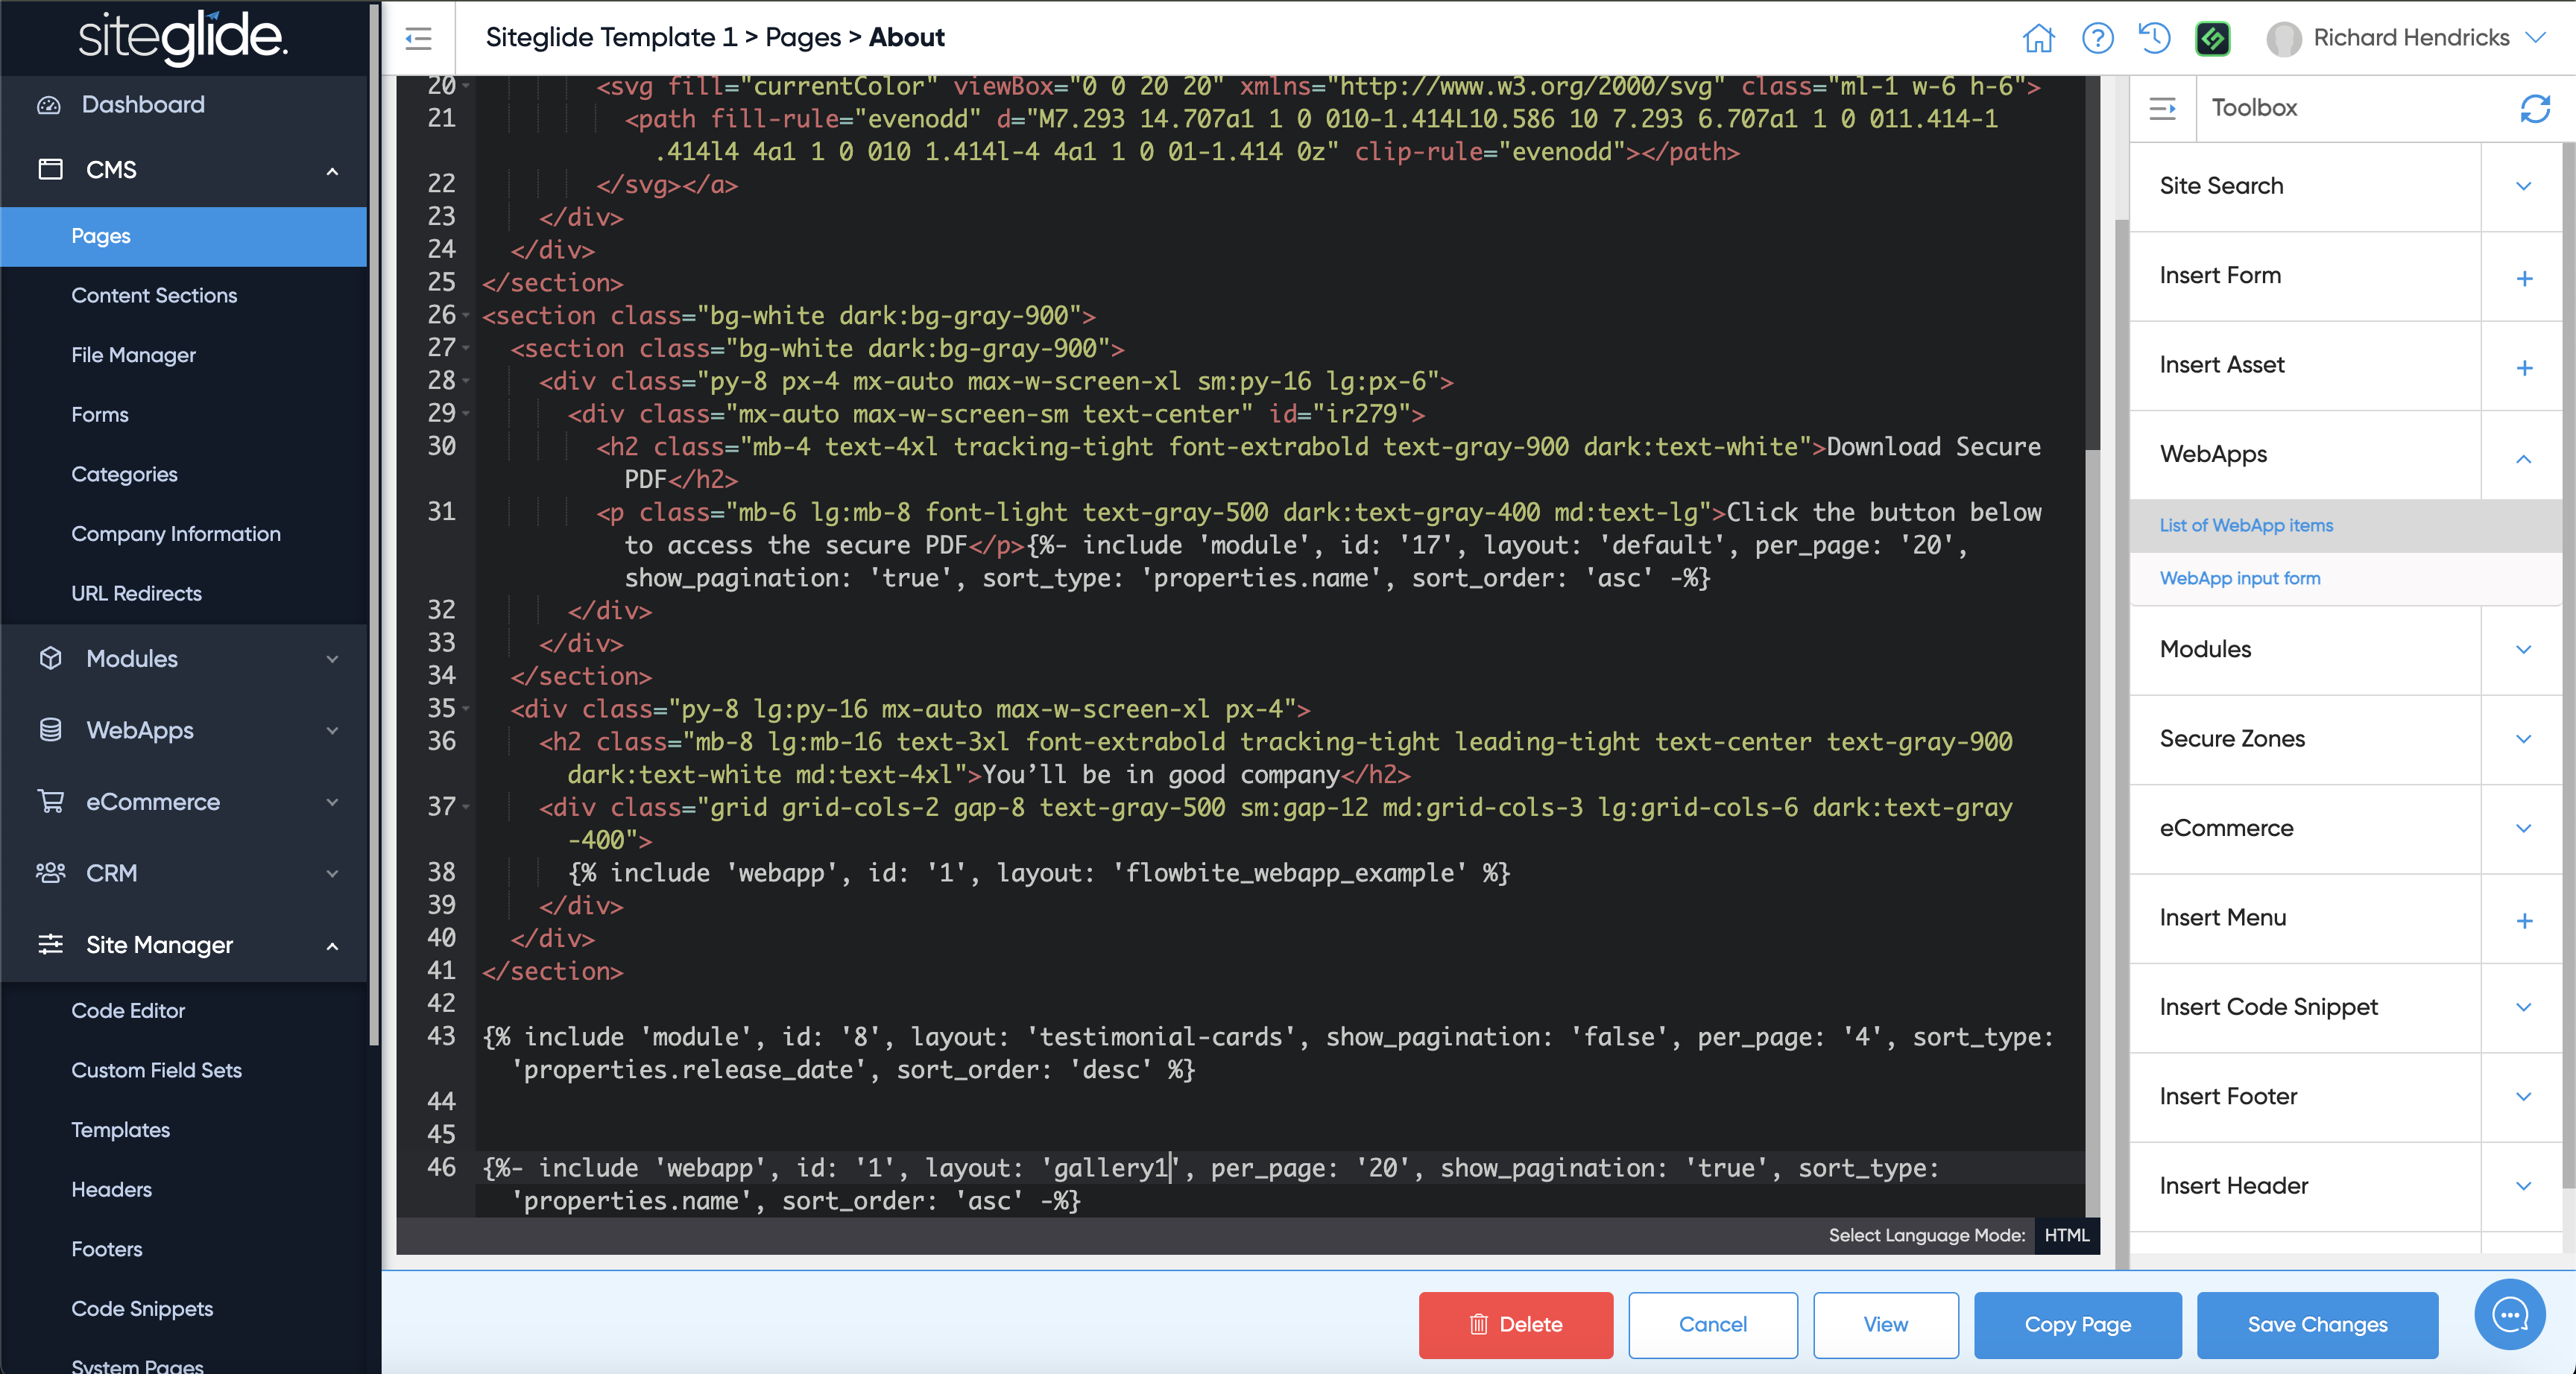
Navigate to the page you want to output the WebApp List View onto and paste (or use Toolbox):

<figure><img src="https://584571746-files.gitbook.io/~/files/v0/b/gitbook-x-prod.appspot.com/o/spaces%2Ft7n2OYNNUr9PgpkBD2eX%2Fuploads%2Fgit-blob-94e818b8131164acb6852f8f68688e3157a079b3%2FSiteglide-WebApps-Include.png?alt=media" alt=""><figcaption></figcaption></figure>

## Step 5: View the Items on the Page

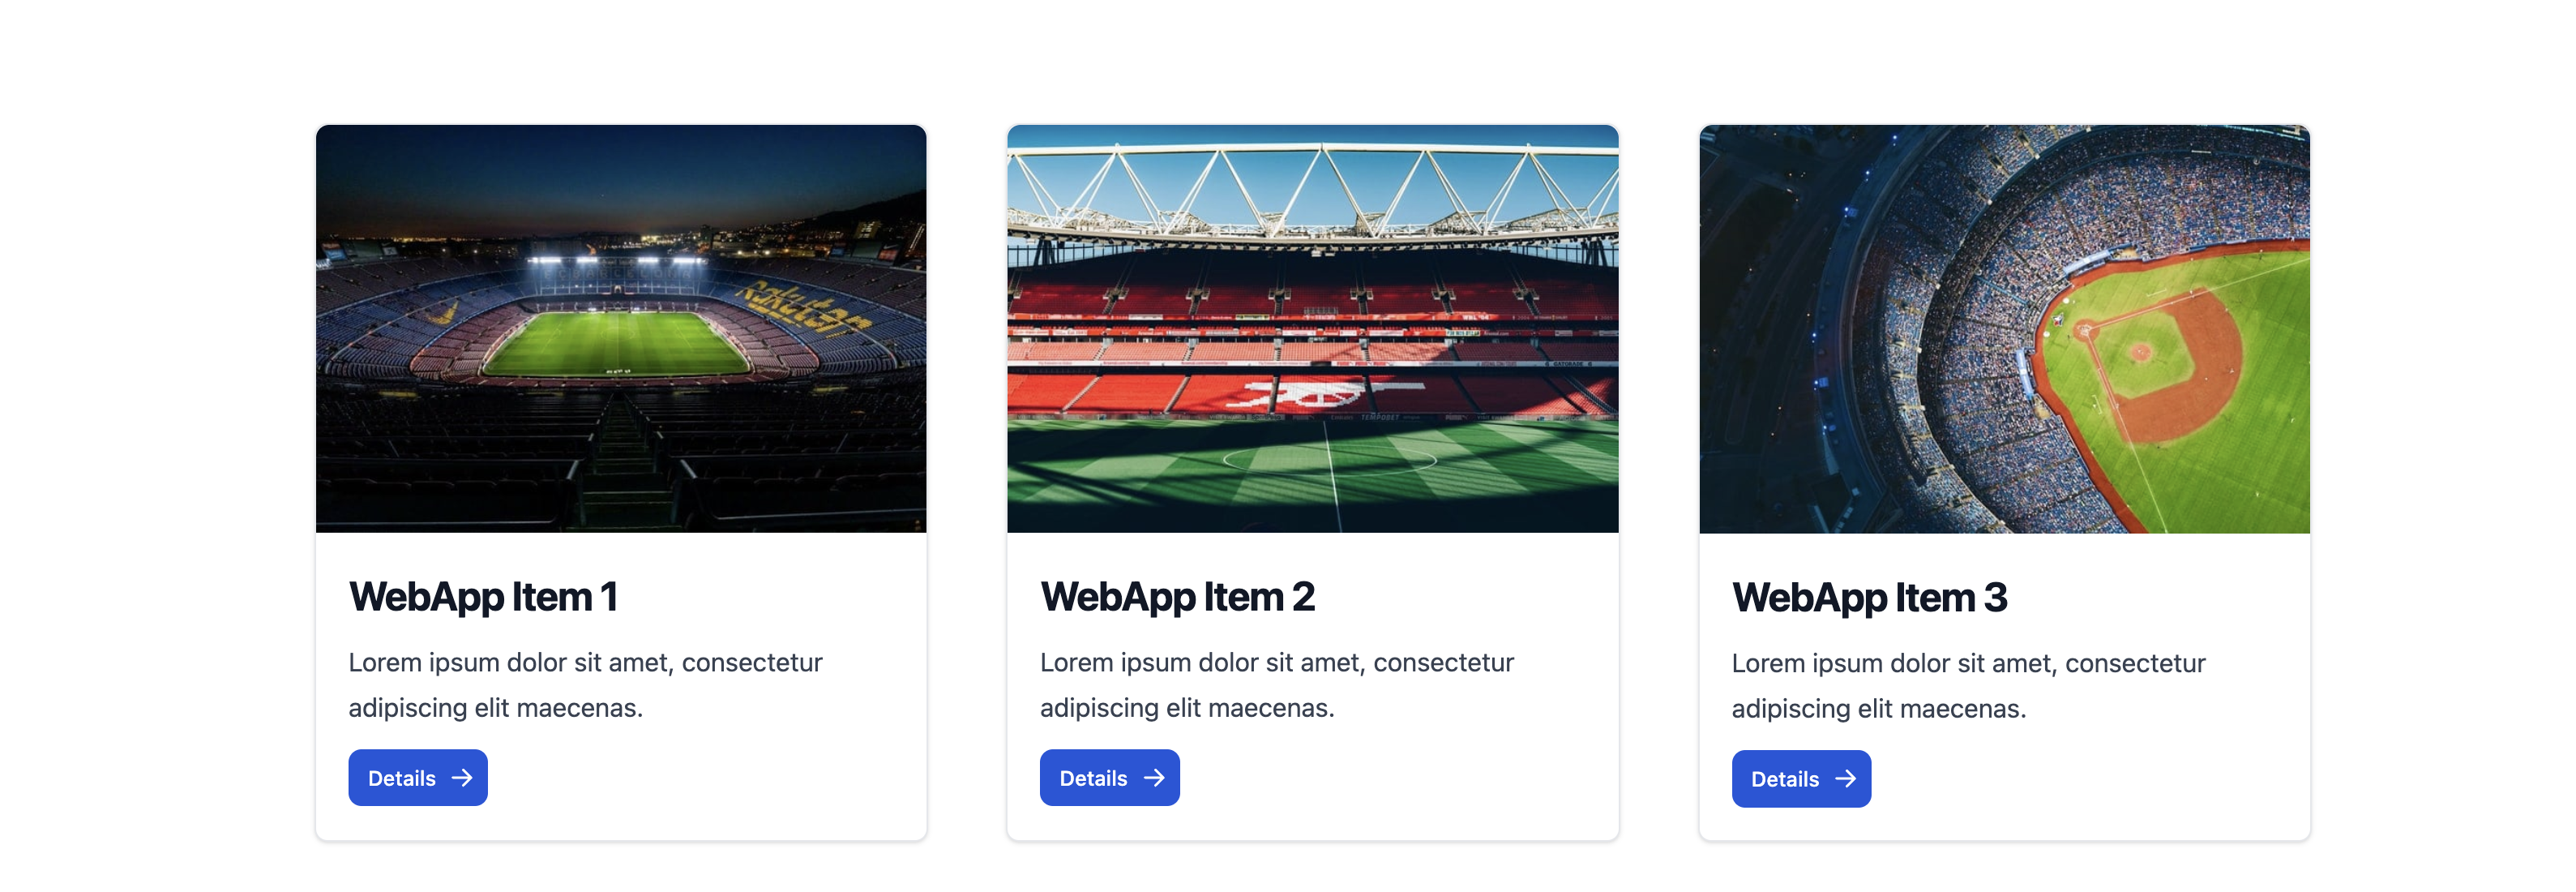
You can then navigate to the page and see the items with the Layout you setup:
<figure><img src="https://584571746-files.gitbook.io/~/files/v0/b/gitbook-x-prod.appspot.com/o/spaces%2Ft7n2OYNNUr9PgpkBD2eX%2Fuploads%2Fgit-blob-d48d45ebacc9171dd3345e2a5cd52bc2424e402e%2FSiteglide-WebApps-Front-End.png?alt=media" alt=""><figcaption></figcaption></figure>