> For the complete documentation index, see [llms.txt](https://documentation.siteglide.com/llms.txt). Markdown versions of documentation pages are available by appending `.md` to page URLs; this page is available as [Markdown](https://documentation.siteglide.com/portal/sites/steps-to-create-your-first-site.md).

# Quickstart: Create a Site

This guide will walk you through the process of creating a new site using Siteglide's admin area.

## Step 1: Access the Dashboard

Once you're logged into the portal, you'll find yourself on the dashboard.

If you don't see a 'Create a Website' button (as per 2nd screenshot) please contact us via Live Chat to prove you're human and we'll get you setup!

<figure><img src="https://p186.p2.n0.cdn.zight.com/items/d5uXKzqk/4dc0d410-7174-42c2-9a35-1f768e63a980.jpg?source=viewer&#x26;v=%223394866977311bdf3f7fed1434b1e117%22" alt=""><figcaption><p>Contact us to prove you're human and we'll get your account approved!</p></figcaption></figure>

Once you're account is approved you should see the Create a Website button:

<figure><img src="https://p186.p2.n0.cdn.zight.com/items/JruErXRj/8a71bcb1-af8a-49d0-b4e3-1c852d527ea1.jpg?source=viewer&#x26;v=%22dd8591f5052a2eccacfd55cba546137a%22" alt=""><figcaption><p>Click 'Create a Website'</p></figcaption></figure>

If you already have 1 or more site you'll see options to create a site, manage existing sites, or manage your company:

<div align="left"><figure><img src="https://p186.p2.n0.cdn.zight.com/items/4gu8gZWZ/71d169a7-5af8-40ac-b517-c858baff1ef6.png?source=viewer&#x26;v=%22207c8f085ac90c7ed93c8c177f3f3872%22" alt=""><figcaption><p>Click 'Create New Site'</p></figcaption></figure></div>

## Step 2: Choose Site Creation Method

You have the option to create a new site from scratch or use a Template.

<figure><img src="https://p186.p2.n0.cdn.zight.com/items/mXuWlEkR/2b98c39f-540b-4864-a4bf-10d215506aa8.jpg?source=viewer&#x26;v=%22dde4f0d458f05746ad79f05e5fb4072b%22" alt=""><figcaption></figcaption></figure>

If you're new to Siteglide or less technical, it's recommended to start with a template because they're built with SiteBuilder, a tool to help you rapidly build and customise websites:

{% content-ref url="/pages/b7eweb4LQ71q3z1Yis1j" %}
[Quickstart: SiteBuilder](https://documentation.siteglide.com/studio-and-sitebuilder/setup-sitebuilder/quickstart-sitebuilder.md)
{% endcontent-ref %}

{% hint style="info" %}
Please follow the above link if you're new to Siteglide
{% endhint %}

The rest of this Quickstart guide will focus on building a Custom Site. Click the 'Build a Custom Site' button.

## Step 3: Name your Custom Site

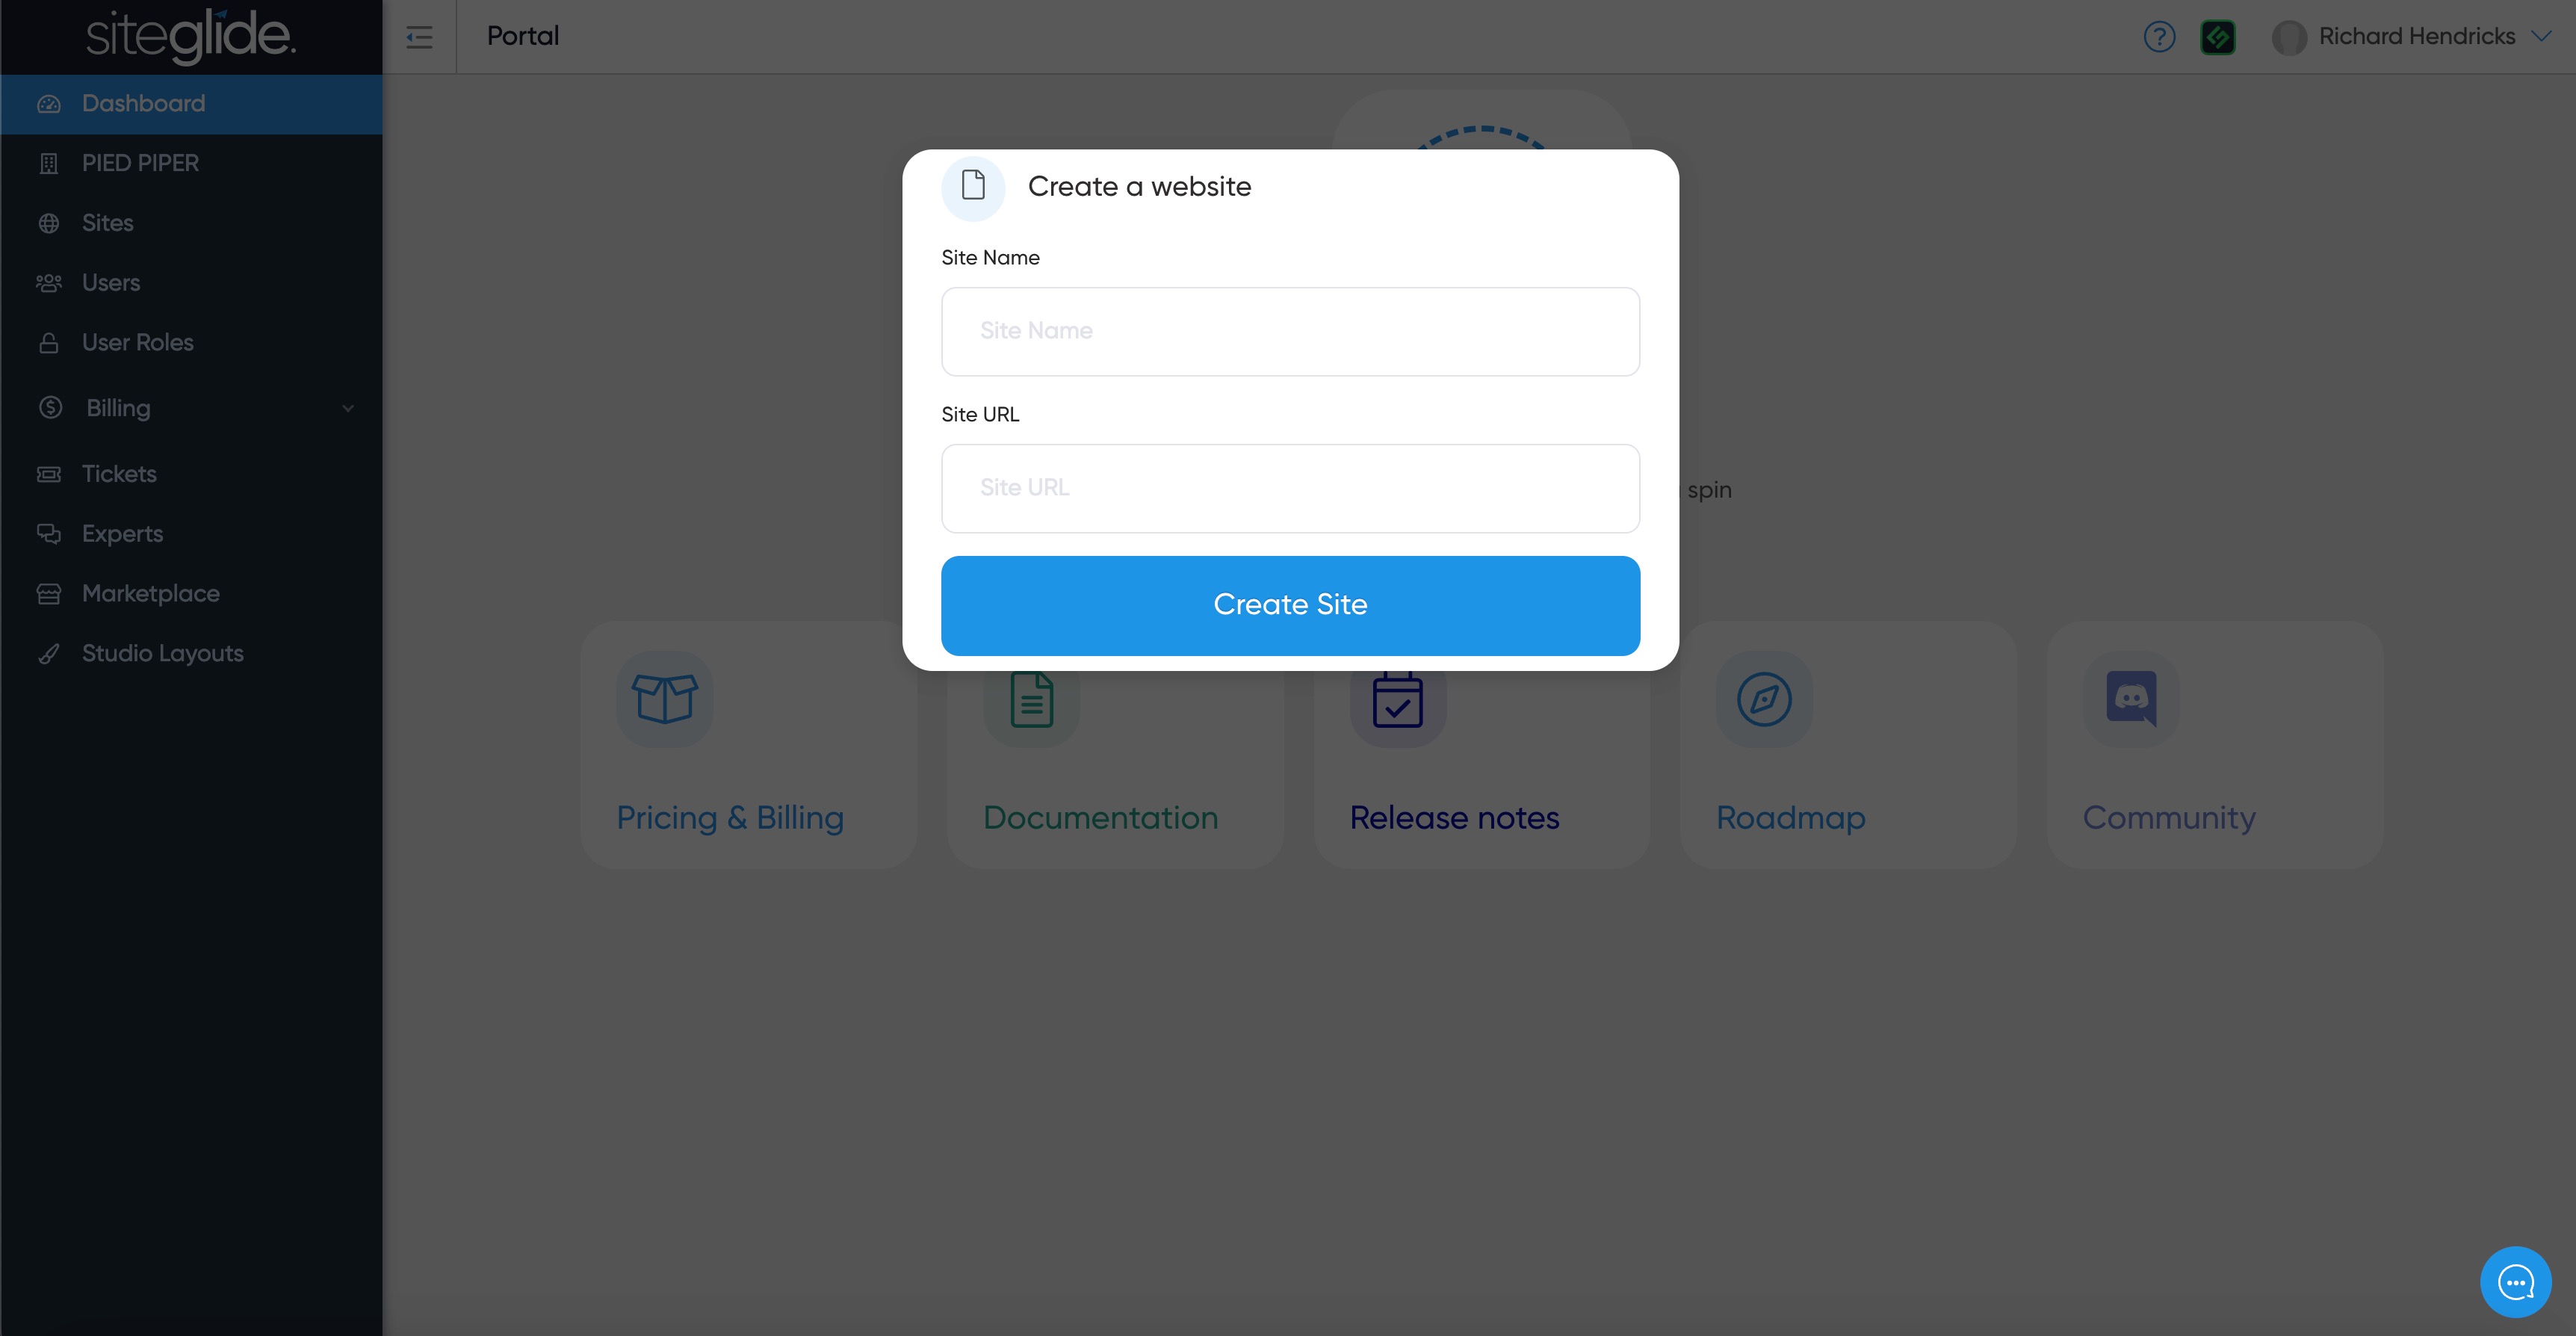
Give the site a name and it will automatically create the URL. You will need to ensure it's unique, if it turns red please amend by making it more unique. Then click Create Site.

<figure><img src="https://584571746-files.gitbook.io/~/files/v0/b/gitbook-x-prod.appspot.com/o/spaces%2Ft7n2OYNNUr9PgpkBD2eX%2Fuploads%2Fgit-blob-259ae353a4e9f12a69d9895dadad5e59d1aadc1a%2FSiteglide-Create-Site-Blank-Modal-Dashboard.jpg?alt=media" alt=""><figcaption></figcaption></figure>

## Step 5: Manage Your New Site Once Ready

And that's it! You've successfully created a new site, you will need to wait for it to be ready to use:

<figure><img src="https://p186.p2.n0.cdn.zight.com/items/v1u9wLZ2/3bf5f58f-56e5-4b32-b427-36fc35cd9bfc.jpg?source=viewer&#x26;v=%22ddbfd9bfe9035551bb2c140d6b3d916c%22" alt=""><figcaption><p>Once you get the email confirming it's ready you will need to refresh this page or click the link from the email</p></figcaption></figure>

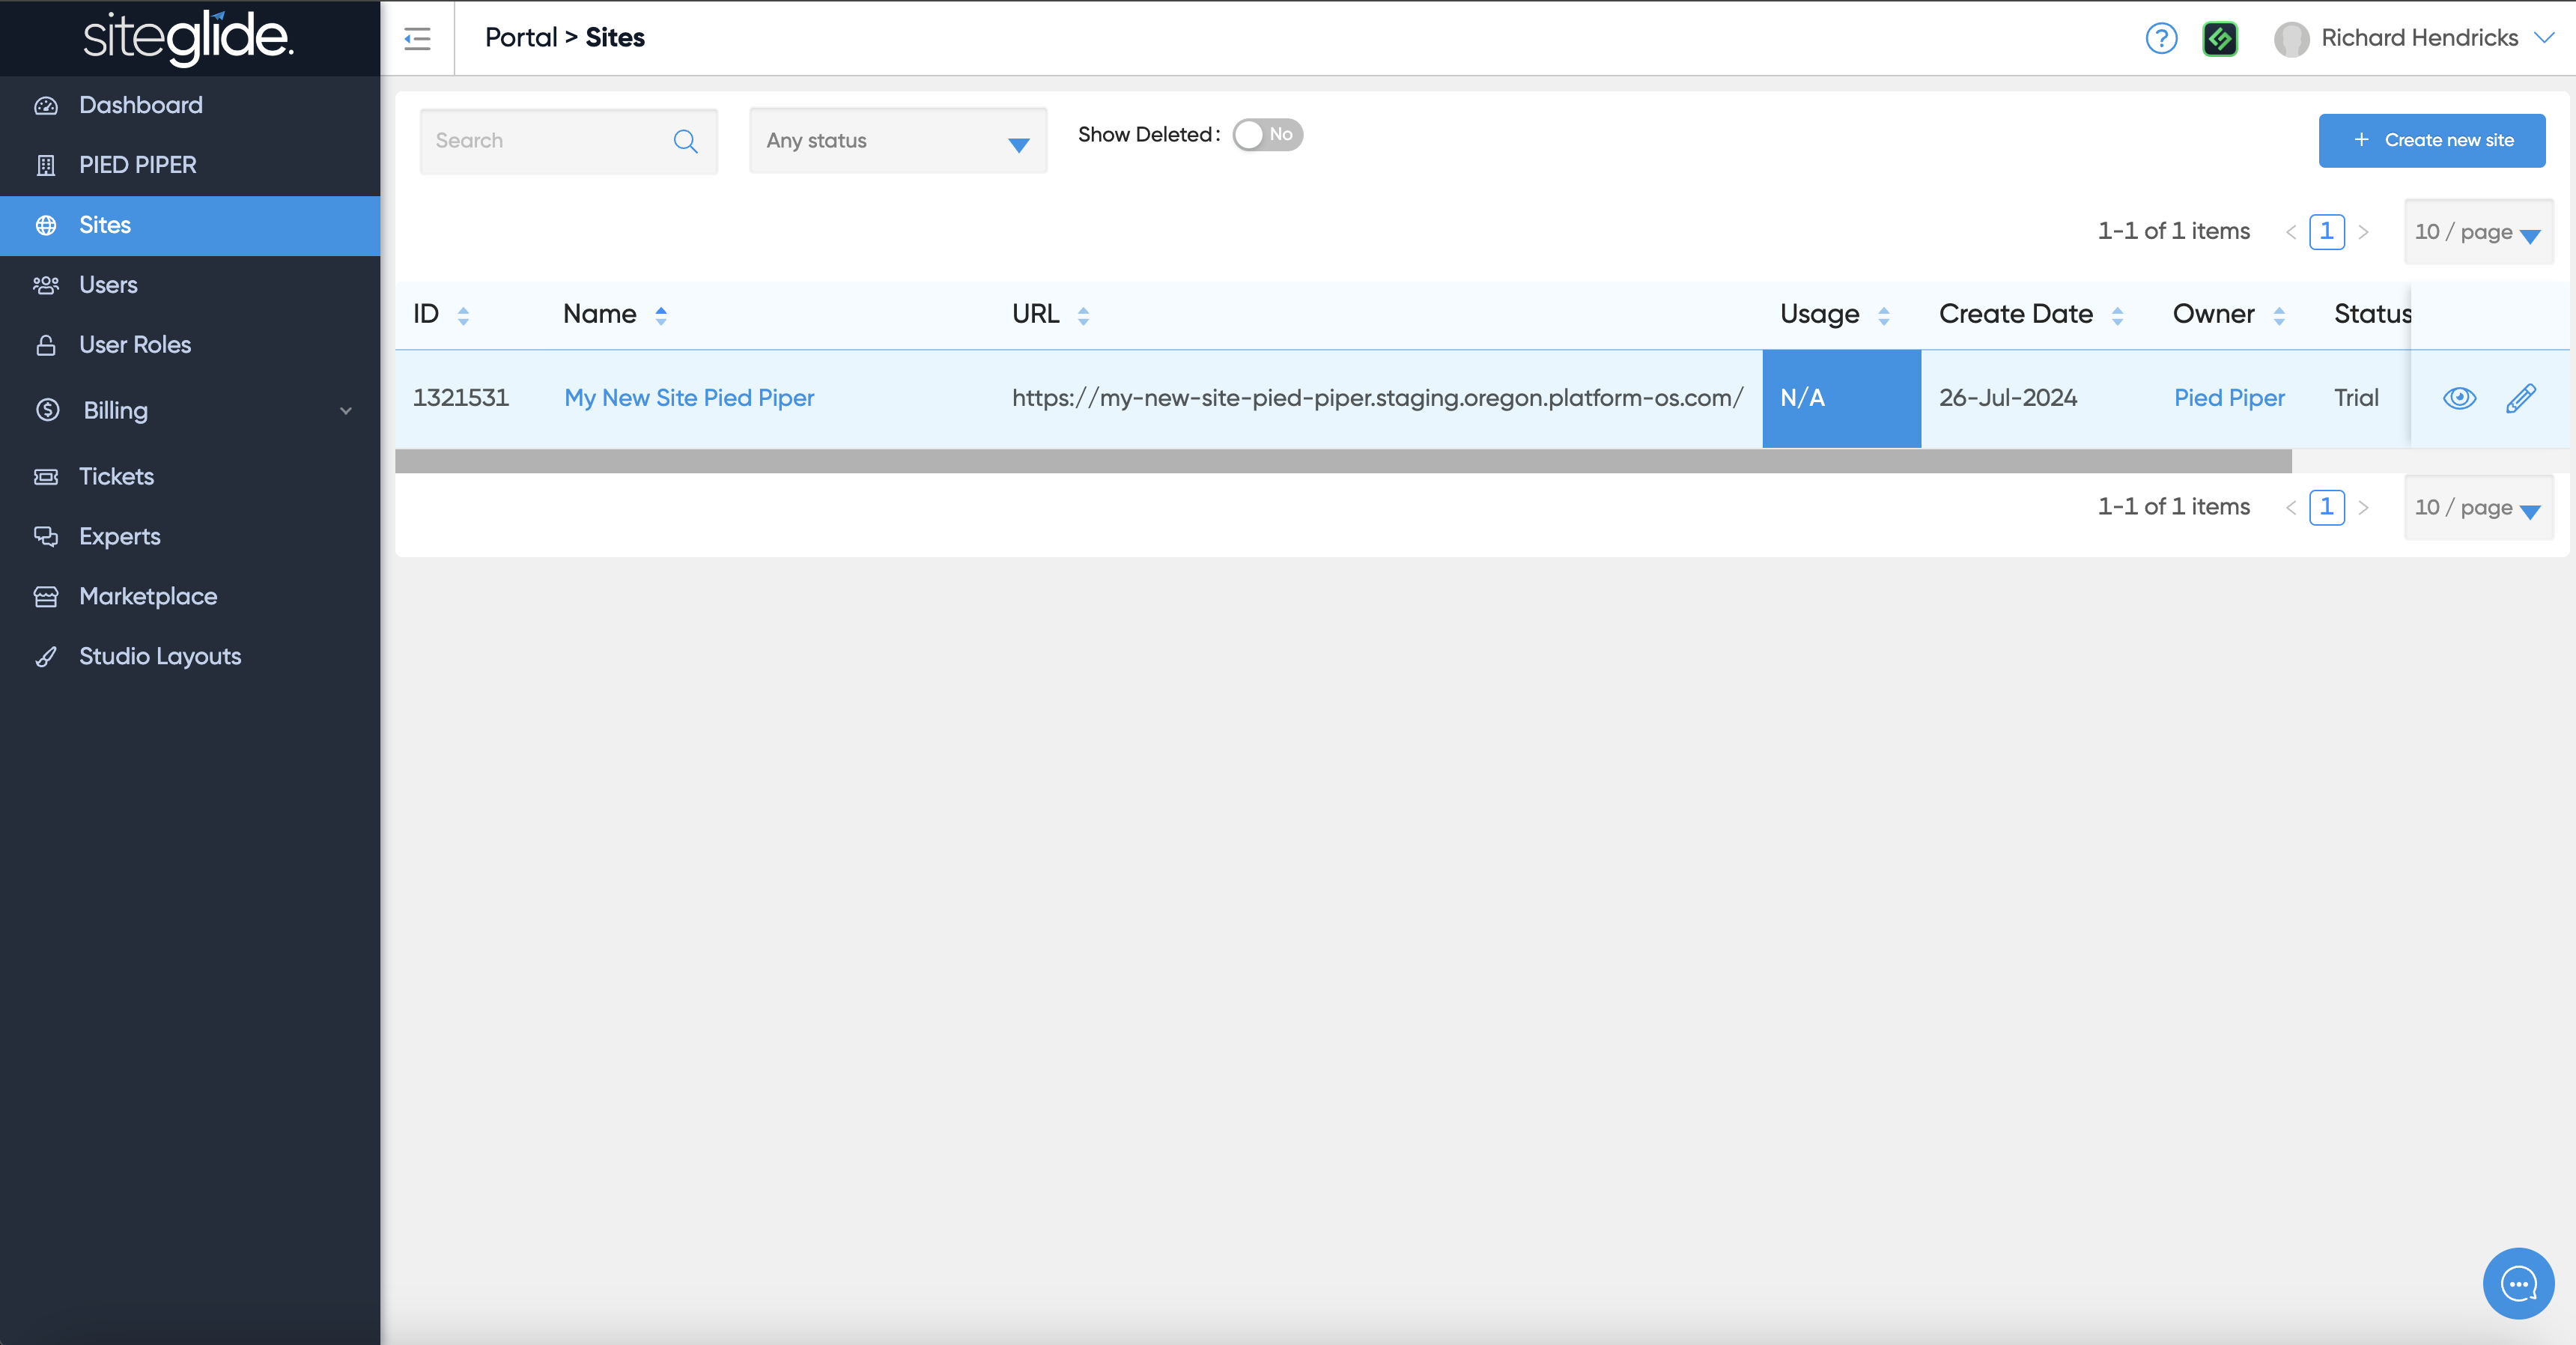
You will receive an email when it's done but can also find it under the Sites area:

<figure><img src="https://584571746-files.gitbook.io/~/files/v0/b/gitbook-x-prod.appspot.com/o/spaces%2Ft7n2OYNNUr9PgpkBD2eX%2Fuploads%2Fgit-blob-7aa31a38314027bb902fa8d3bb815136cbe52539%2FSiteglide-Sites-List.png?alt=media" alt=""><figcaption></figcaption></figure>

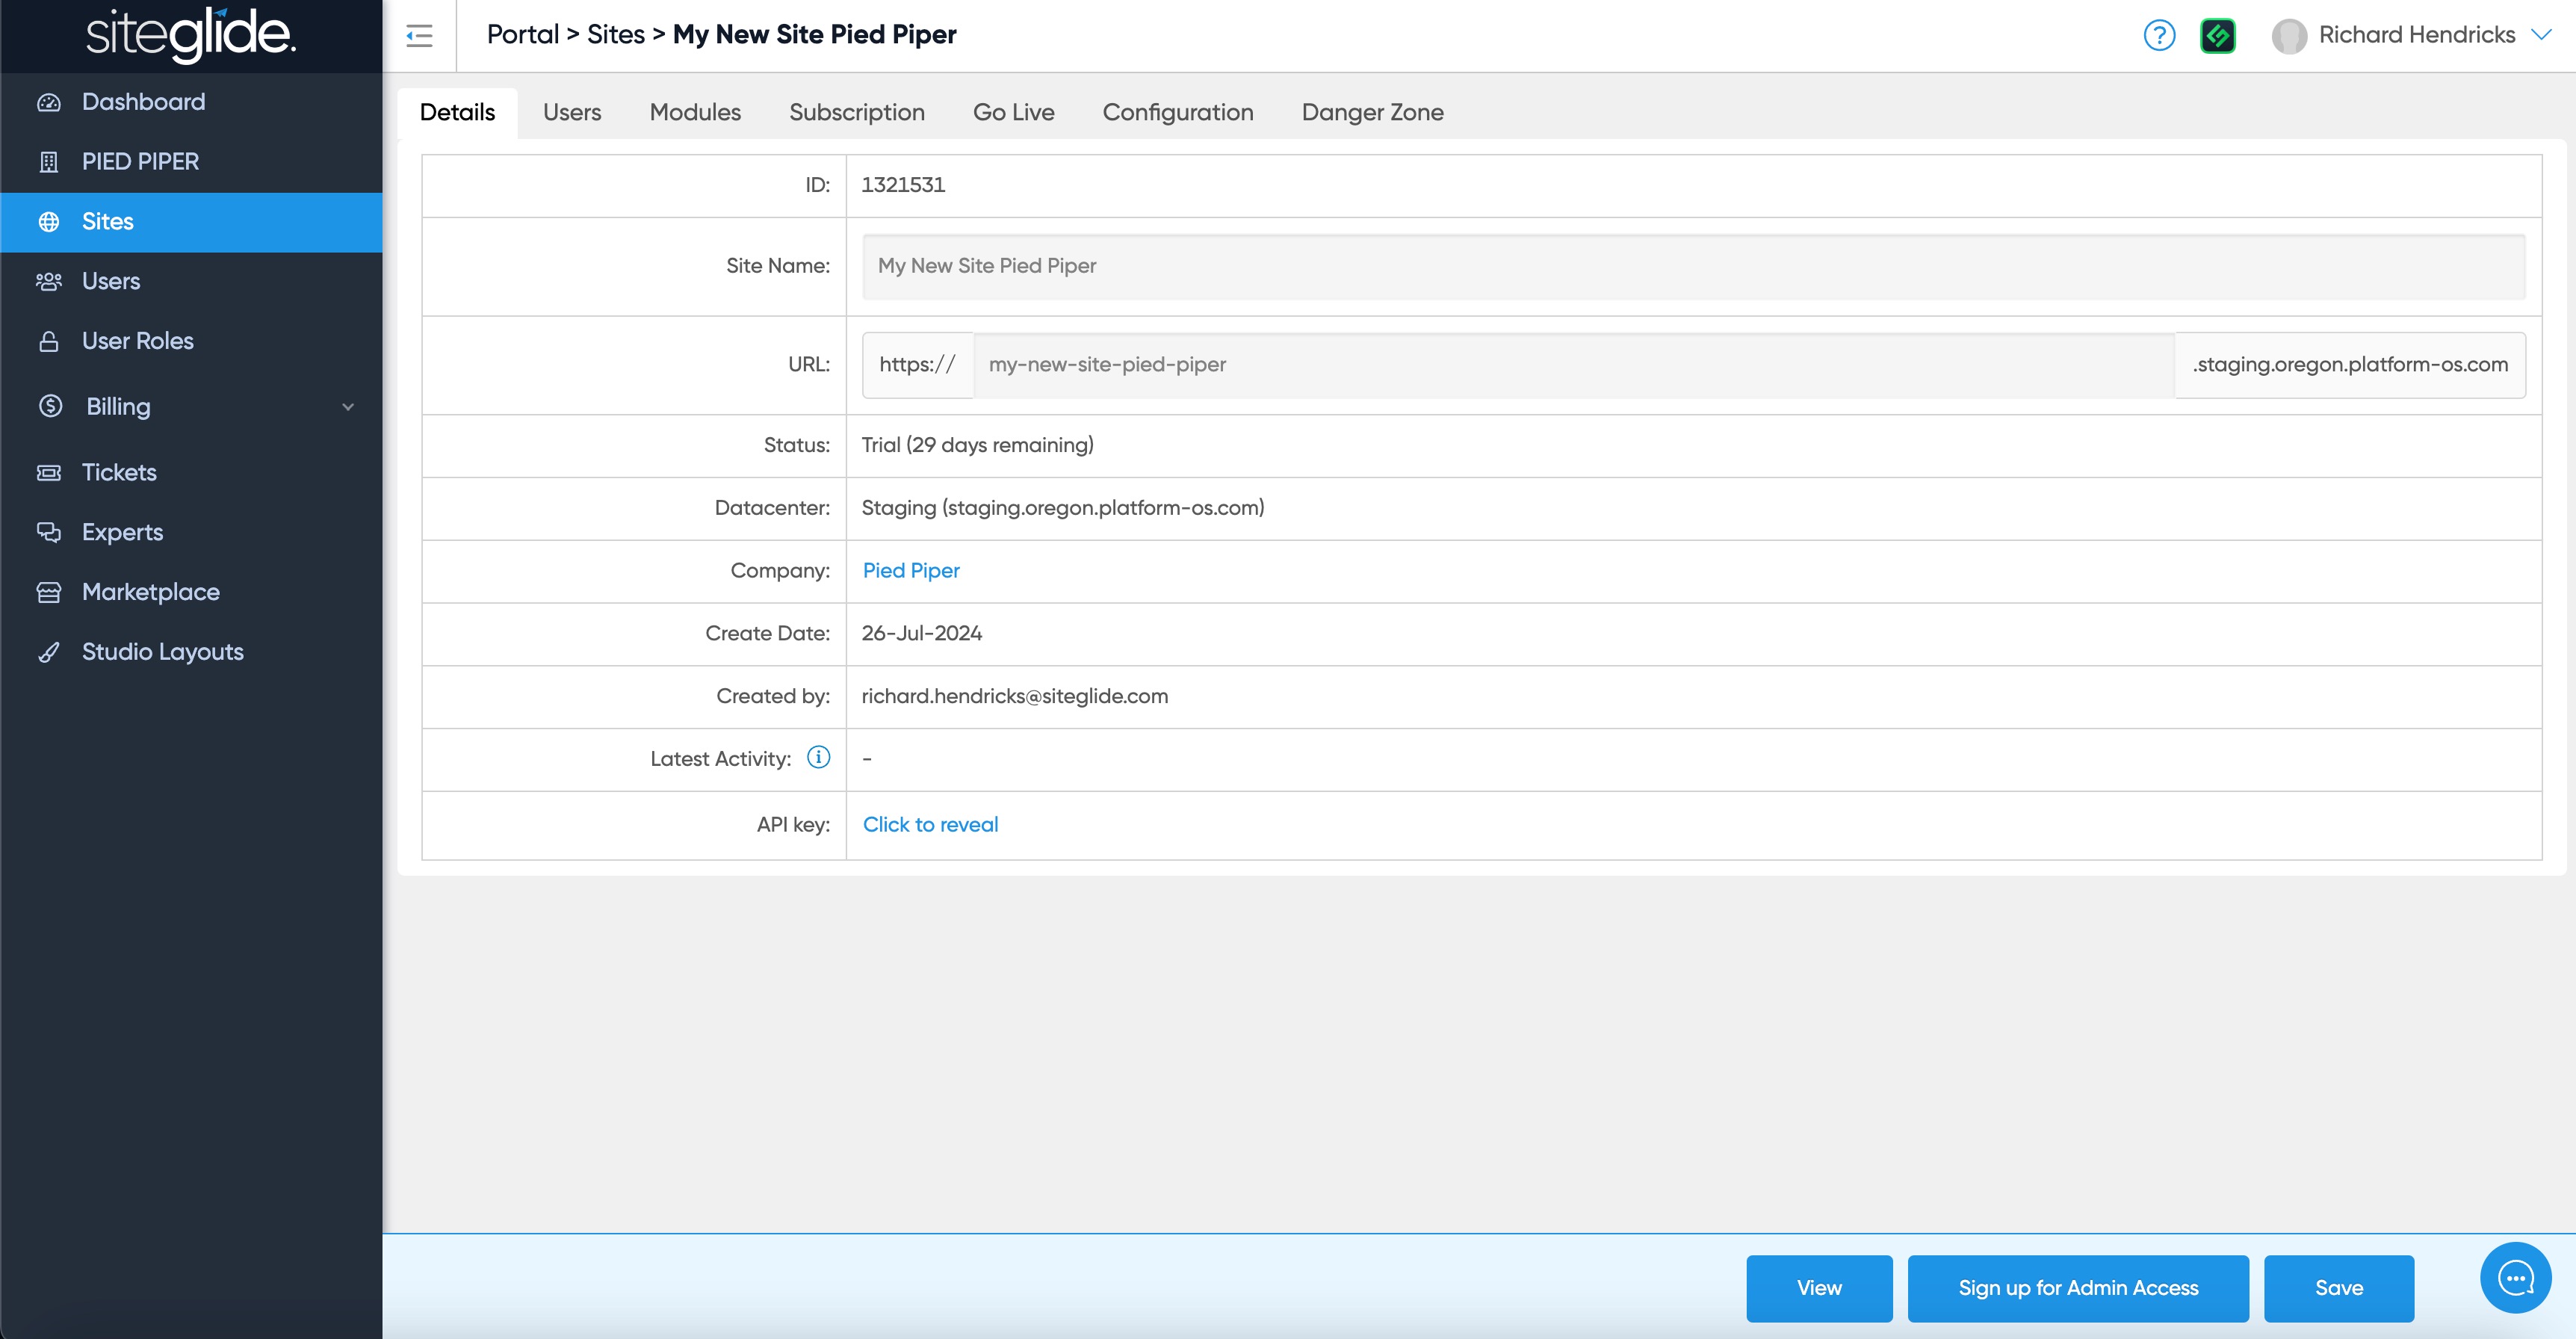
The Status will show as Trial and there will be a new blue button in the bottom bar that will likely say Sign up for Admin Access if you've not yet used it, otherwise it'll say Admin going forwards:

<figure><img src="https://584571746-files.gitbook.io/~/files/v0/b/gitbook-x-prod.appspot.com/o/spaces%2Ft7n2OYNNUr9PgpkBD2eX%2Fuploads%2Fgit-blob-191169c47818c25be2840c1c04b380ede0ad9bae%2FSiteglide-Site-Details.jpg?alt=media" alt=""><figcaption><p>Click Sign up for Admin Access and you'll then be on the Site Dashboard</p></figcaption></figure>

## Next Steps:

Click through to Administer the Site and you'll end up on the Dashboard:

{% content-ref url="/pages/vm3EoEAErAbYn6cxZNwx" %}
[Dashboard](https://documentation.siteglide.com/cms/dashboard.md)
{% endcontent-ref %}

If you're a developer you'll likely want to set up our CLI:

{% content-ref url="/pages/5mdxf4eLXNH96SLHjKlc" %}
[Quickstart: CLI](https://documentation.siteglide.com/developer-tools/cli/quickstart.md)
{% endcontent-ref %}